How to Add Social Media Icons in WordPress and Why You Should Do It
Social media is vital for modern businesses. They offer tools for understanding customers and engaging in effective public relations.
Launching a WordPress site and embedding social profiles on it helps build an integrated digital presence. It also helps create a more engaging and trustworthy brand.
This article will discuss how to incorporate social media icons into your WordPress website and explore its benefits.
Download all in one WordPress cheat sheet
How to Add Social Media Icons to WordPress
There are three common methods for adding social media icons on WordPress – using the Site Editor, a plugin, and a widget.
The Site Editor and social media plugin methods are more beginner-friendly. Meanwhile, using a widget involves more steps but offers more flexibility to choose the icons.
How to Add Social Media Icons Using the Site Editor
The Site Editor offers many website customization options, including adding WordPress social icons.
Keep in mind that this method works best for block themes. If you are a WordPress classic theme user, feel free to skip to the next method.
The exact steps for integrating icons for social media using Site Editor will depend on your chosen theme. Here are the general steps:
- From your WordPress dashboard, navigate to Appearance → Editor to access the Site Editor interface.
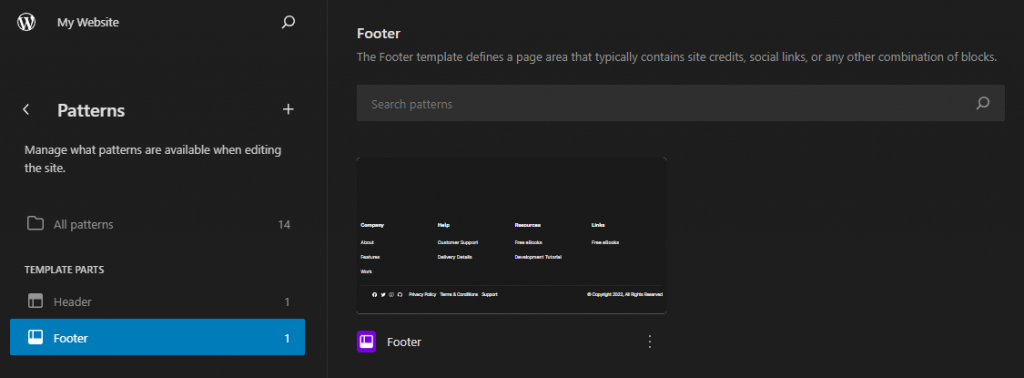
- Open the navigation sidebar and go to Patterns → Footer.
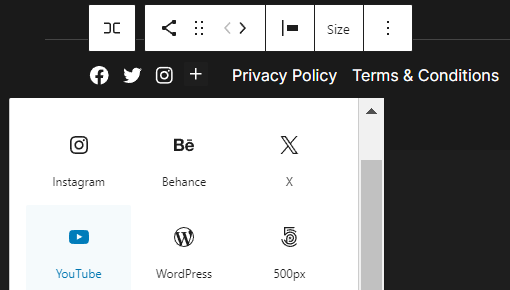
- Locate the social menu icons in the footer area and click one to customize the text and the URL. Press Enter to apply the changes. If the theme doesn’t include the social icons by default, click the (+) sign to open the block inserter and add the Social Icons block.
- This theme sets Facebook, Twitter, Instagram, and GitHub icons by default. If you want to add a new one, click the (+) sign and the icon you want to add, for example, YouTube.
- Then, the icon will be added automatically, and you can start customizing the URL.
Repeat steps 4 and 5 to add new icons for other social network platforms.
How to Add Social Media Icons Using a Plugin
There are plenty of WordPress social media plugins that let you add various social icons to your site.
Every plugin has a different way of adding icons to a WordPress site. In this article, we’ll use the free plugin Social Media Share Buttons and Social Sharing Icons. It’s one of the best and most popular social icon plugins.
First, install the WordPress plugin. You can do this from your dashboard by navigating to Plugins → Add New and browsing for the Social Media Share Buttons and Social Sharing Icons plugin using the search bar. Once you’ve found it, click Install and then Activate.
To configure the social icons, head to the plugin’s settings page from the sidebar and follow these steps:
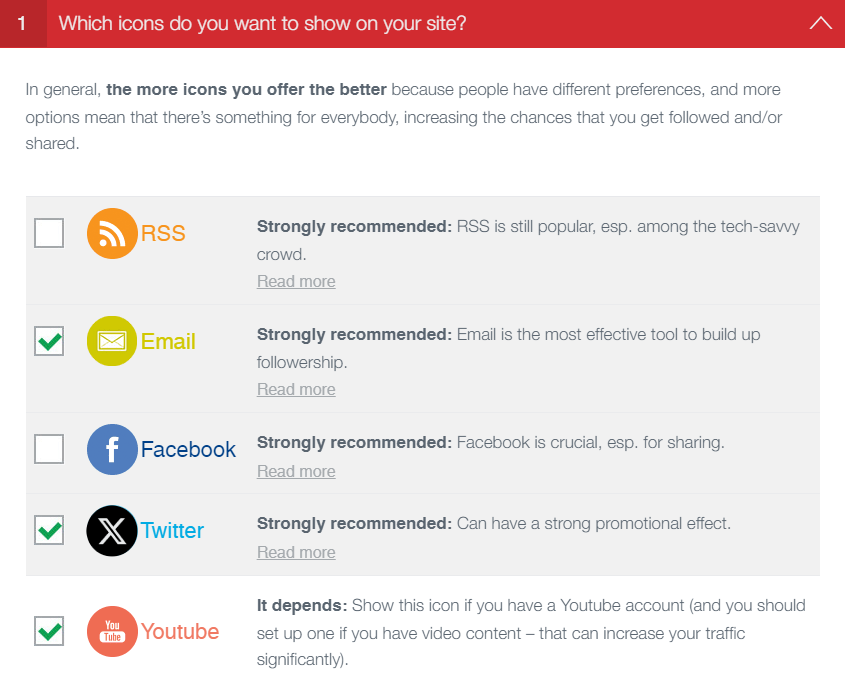
- Open the Which icons do you want to show on your site? menu to see all the available icons.
- Select the social network platforms you want to add, for example, Email, Twitter, and YouTube. Click Save to apply the changes.
- Open the What do you want the icons to do? menu and configure what each social button does. For example, if you want the buttons to direct users to your social profiles, check the Visit me on Twitter option and paste your social media account URL. Click Save to apply the changes.
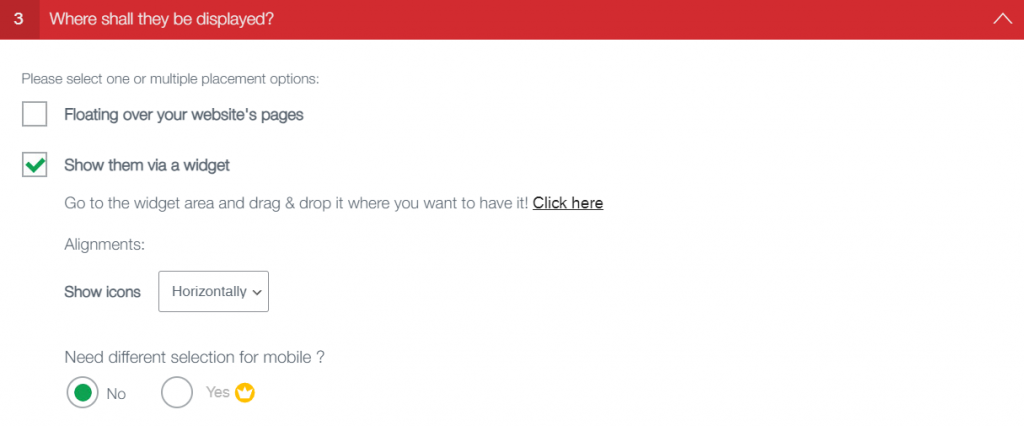
- Open the Where shall they be displayed? menu and select the placement options. Click Save to save changes.
The Social Media Share Buttons & Social Sharing Icons plugin also lets you customize the icons’ appearance.
For example, you can choose the icon design in the What design & animation do you want to give your icons? accordion menu. You can also change image size and icon spacing in the Any other wishes for your main icons? menu.
How to Add Social Icons Using a WordPress Widget
Adding social icons to WordPress using a widget is the more advanced method because it might require some code editing. On the upside, this method gives you more flexibility. You can use the icons as you see fit and place them in the sidebar or footer widgets.
Here are two methods for displaying social icons on WordPress websites through the widgets tool. The first method uses the Social Icons block, and the second one uses custom icons.
This method works best for classic WordPress themes.
Using the Social Icons Block
This method enables you to display icons through the widget editor without coding using the Social Icons block. Here’s the step-by-step guide:
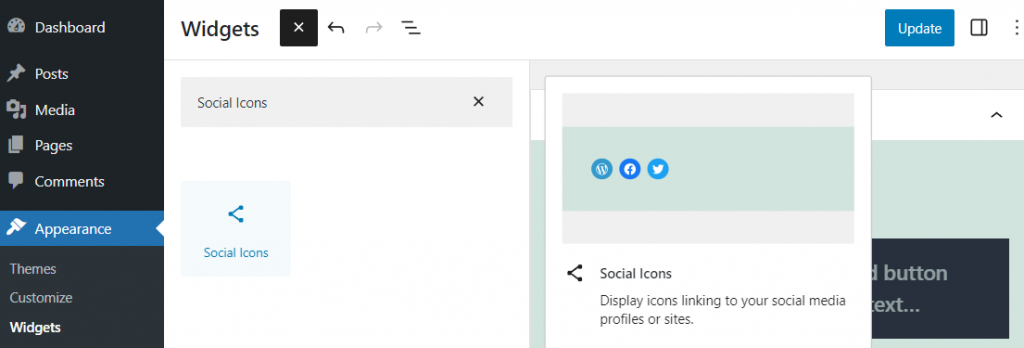
- Go to Appearance → Widgets.
- Click the (+) sign and search for the Social Icons block.
- Click (+) to add your first icon, like Behance, Instagram, or Twitter.
- Click on an icon to open the URL field. Copy and paste your social profile URL, like twitter.com/Example. Then, press Enter.
Repeat steps 3 and 4 to add other social network platforms’ icons.
Using Custom Icons
With thousands of choices available, using custom icons offers several significant benefits. They help establish a distinct brand identity, setting your site apart from competitors who use generic, pre-designed icons.
Another benefit of using the social icons widget is that it will remain on your site when switching to a different theme. Other methods may require you to reconfigure the social icons after switching themes.
With this method, you will have to find icons to upload to your WordPress site and set them as social media buttons. Follow these steps:
- Find and download a social media icon. Use websites like Iconfinder or Font Awesome Icons to find free-to-use icons to download. If you use Google image search to find an icon, filter it by navigating to Tools → Usage rights → Creative Commons licenses to avoid copyright issues.
- Download the icons you want to use to your local computer.
- Open your WordPress dashboard, and go to Media → Add New.
- Upload the social icons to the WordPress media library. Feel free to upload multiple images at once.
- Open the widget editor by navigating to Appearance → Widgets.
- Select the area where you want to add the social icons. Then, add the Custom HTML block by clicking the + button where you want to place them.
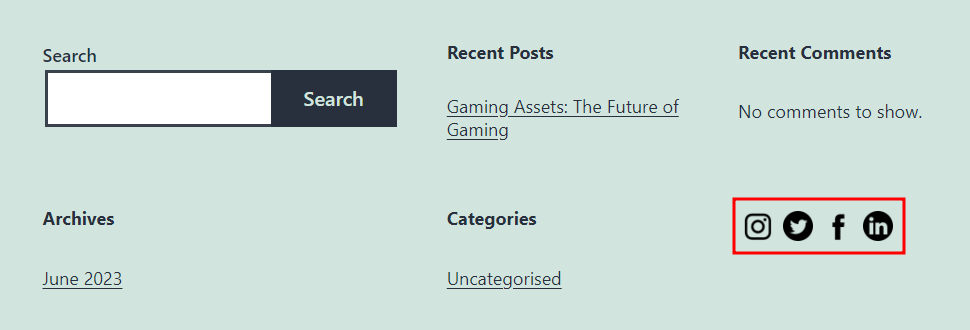
- To add Instagram, Twitter, Facebook, and LinkedIn social icons, copy and paste the following HTML code:
<div><a href="http://instagram.com/username"><img style="margin:5px" src="[path to your icon]" width="30" height="30" alt="Instagram"></a><a href="http://twitter.com/username"><img style="margin:5px" src="[path to your icon]" width="30" height="30" alt="Twitter"></a><a href="http://facebook.com/username"><img style="margin:5px" src="[path to your icon]" width="30" height="30" alt="Facebook"></a><a href="http://linkedin.com/user/username" ><img style="margin:5px" src="[path to your icon]" width="30" height="30" alt="LinkedIn"></a></div>
In the code snippet above, replace [username] with the link to your social media profile.
Then, replace [path to your icon] with the image URL. To find it, go to Media → Library and open the icon. In the File URL field, Copy URL to clipboard to fetch the URL easily. Be sure to place the correct URL for each social media button in the code snippet.
Here’s what it might look like:
- Click Update to save the changes.
To add more social accounts, enter the following to the code snippet after the last </a> tag:
<a href="[social media profile URL]"><img style="margin:5px" src="[path to your icon]" width="30" height="30" alt="[Name of the social media platform]"></a>Now, visit your website. You should see the social icons in the widget area. Test them to see if they are directed to the correct social media pages.
Suggested Reading
Check out our comprehensive WordPress guide and build a robust website for personal or professional purposes.
Why You Should Have Social Icons in WordPress
Social media platforms let you connect with your audience and spread brand awareness.
From the customer’s perspective, a business’s social media accounts are convenient channels for product news and updates.
Therefore, sharing your social media handles through icons on your site is essential. Icons are better than plain social media links because they use recognizable images to catch visitors’ attention.
You can also add call-to-action text around social icons like Follow Us or Find Us At to encourage visitors to click the buttons and increase their engagement.
Tips on Integrating Social Media Into Your WordPress Site
Integrating social media into your website is a fantastic way to connect with your audience and extend your reach. Here are some tips for blending social links with your site’s design and content strategy:
Place the Social Media Icons Strategically
Location is critical when it comes to WordPress social media icons. You want them to be easily noticeable to your visitors without overwhelming your website’s layout.
A good practice is to place them in the header or footer, where they’re visible but not intrusive. Consider the flow of your website and place these icons where they feel natural and accessible without disrupting the user’s experience.
Use the Right Social Media Icon Design
Your social icon designs should complement your site’s overall aesthetic instead of disrupting it. Consistency in design also helps maintain a professional look.
For example, if your site has a minimalist black-and-white theme, opt for social icon designs that match this style.
Choose the Right Social Media
Not all platforms, including major social networks, will be relevant to your website or audience. Choose platforms where your target audience is most active.
For example, a business-to-business (B2B) service provider might prioritize LinkedIn, while a creative artist might get more engagement on Instagram or Pinterest.
Selecting the right platforms ensures your efforts are concentrated where they will be most effective.
Consider Adding Social Sharing Buttons
In addition to social media profiles, consider integrating social sharing buttons. These buttons let visitors easily share your content or products on their accounts. Therefore, they help increase your content’s reach and drive more traffic to your site.
Ensure these buttons are placed strategically – like under the blog post title or near a product description – to encourage sharing.
Conclusion
Social platforms are powerful tools for connecting with your audience and increasing brand awareness. By inviting visitors to your social media profiles through eye-catching icons, you can provide convenient channels for customers to access product news and updates.
We’ve discussed three methods to embed social media icons into a WordPress site:
- Using Site Editor. It’s the easiest way to add icons without coding or a plugin. This method is best for block-based themes.
- Using WordPress social media plugin. A robust social media plugin lets you add icons and links easily. It also provides many configuration options.
- Using a WordPress social media widget. This method provides the most flexibility, as you can choose whatever icons you want and configure their appearances. However, it may require some code editing.
Following the best practices for integrating social media into your website is also necessary. Place social media icons strategically to make them easily noticeable without overwhelming your website’s layout. Also, focus on platforms where your target audience is most active to maximize your efforts.
If you still have any questions, feel free to leave them in the comments section.

Learn more about embedding social media to your WordPress site:
How to Add Instagram Feed to WordPress
Best WordPress Instagram Plugins
How to Add Facebook “Like” Button in WordPress
How to Add Social Media Icons to WordPress FAQ
This section will address common queries regarding integrating social media into a WordPress website:
How Do I Add Social Media Icons to My WordPress Menu?
Go to your dashboard and navigate to Appearance → Menus. Here, you can add custom links for each social media profile and place them in your desired menu. Label each link with the name of the social platform for easy identification.
How to Add Social Media Icons to WordPress Without a Plugin?
The Site Editor lets you add social media icons to your WordPress website without a plugin. Simply navigate to Appearance → Editor → Patterns to edit the template parts. Then, customize the pre-designed icons directly in the editor.
Where Do I Put Social Media Icons on My WordPress Website?
Place them in areas where they are easily visible but not intrusive. Common placements include the header, footer, or sidebar. Ensure they are accessible but do not distract from your main content.










Comments
August 15 2020
This is brilliant, thank you so much!