How to Host a Bluesky Personal Data Server to Build Your Own Decentralized Social Network
Bluesky is a decentralized social media platform built on AT Protocol. It aims to provide a federated social environment. A key component of this ecosystem is the Bluesky Personal Data Server (PDS), allowing users to manage their data independently and securely.
Hosting your own Bluesky PDS offers several advantages, including enhanced control over personal data, rich customization options, and valuable learning opportunities in server management and decentralized technologies.
In this article, you’ll learn how to host a Bluesky PDS on a virtual private server (VPS). By following our guide, you can set up a powerful and secure federated service, ensuring your data remains private and under your control.
Prerequisites for Hosting a Bluesky PDS
Before you start hosting a Bluesky PDS, make sure your setup meets the following server requirements:
- Operating system – Ubuntu 20.04/22.04 or Debian 11/12.
- CPU – at least a single CPU core.
- RAM – minimum of 1 GB.
- Storage – at least 20 GB of SSD space.
Additionally, you’ll need a valid domain name to make your server accessible to users. If you don’t own any, we recommend getting one from Hostinger. This way, you can configure both your server and domain from one intuitive dashboard.
Domain Name Checker
Instantly check domain name availability.
How to Host a Bluesky PDS
Here are the steps to set up your own self-hosted Bluesky PDS. For this tutorial, we use an Ubuntu 22.04 distribution.
1. Get the Right VPS Hosting
Choosing the right VPS provider is important for your Bluesky PDS’s smooth operation. Hostinger’s VPS is an ideal solution due to its reliable performance, security measures, and scalability options.
Our KVM-based VPS plans are powered by up to eight cores of AMD CPU, 32 GB of RAM, and 400 GB of NVMe storage for your resource-demanding applications. Meanwhile, our firewall and DDoS protection prevent harmful traffic from reaching your server.
Based on hardware requirements from the previous section, we recommend choosing the KVM 1 plan with a single-core CPU, 1 GB of RAM, and 50 GB of disk space. You can upgrade to higher plans anytime to accommodate growing needs.

After purchasing your desired plan, here’s how to get your VPS started:
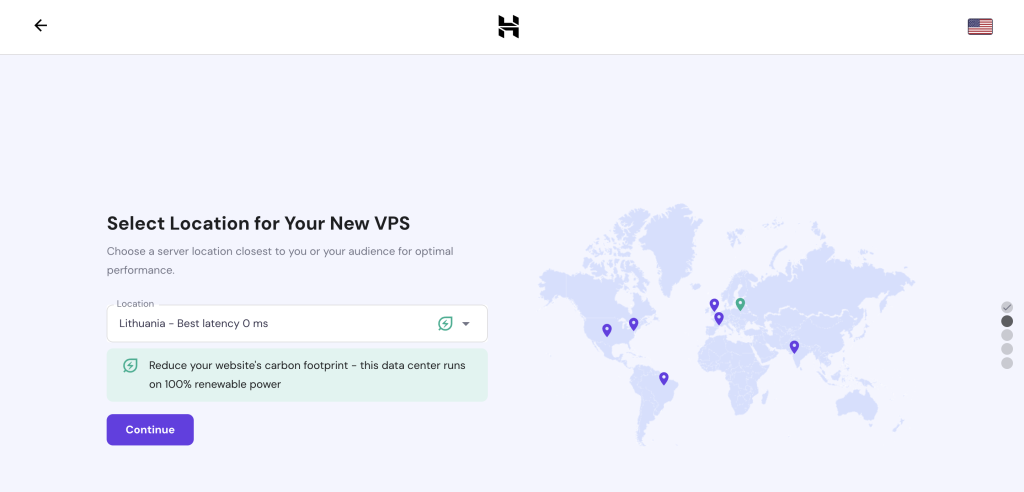
- Follow the onboarding flow to choose your server location, select the operating system, and create a root password.
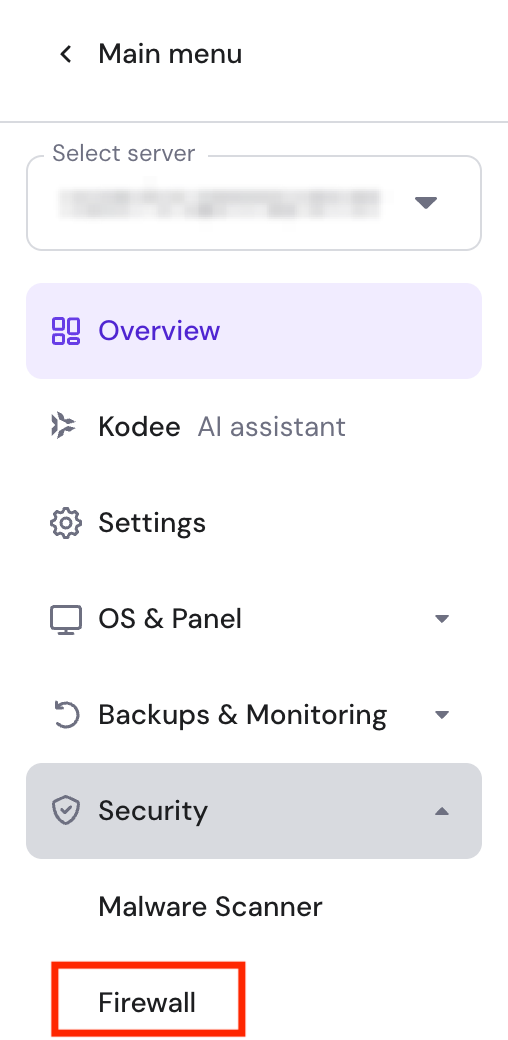
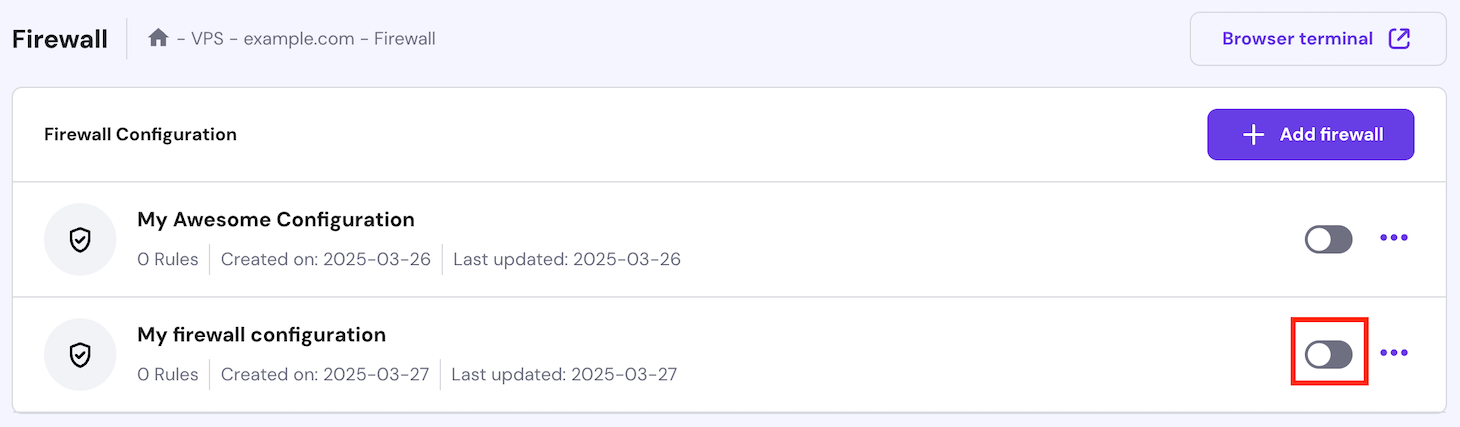
- Once done, access your VPS Overview page and go to sidebar → Security → Firewall. You’ll open ports 80 and 443 to allow web traffic.
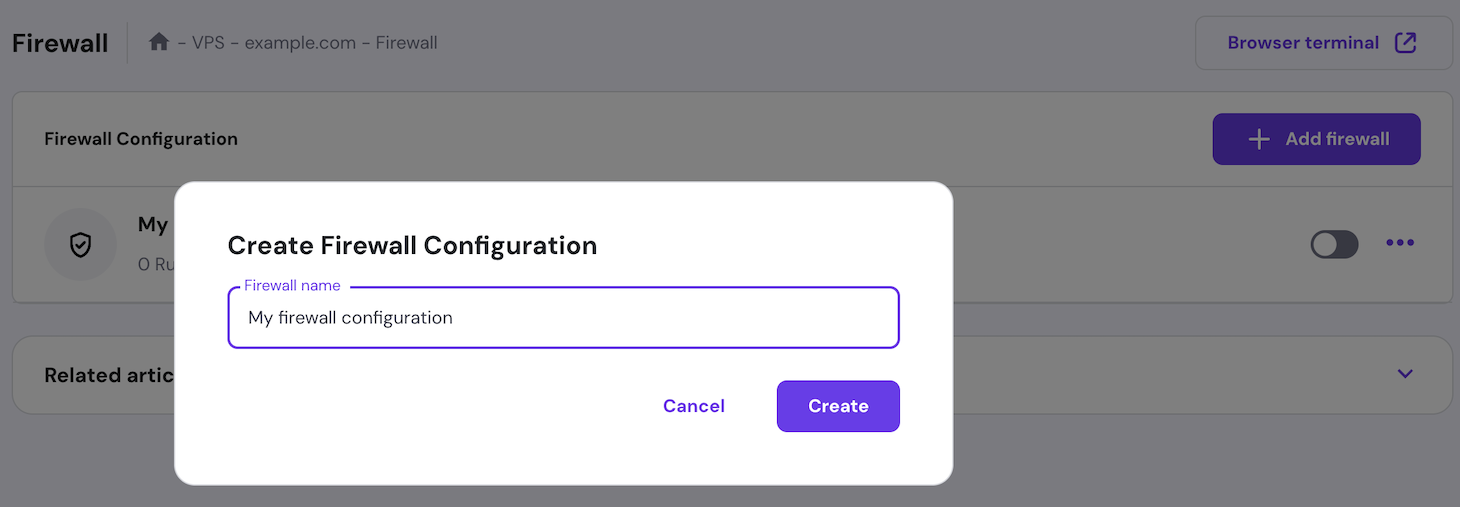
- Click Create Firewall Configuration and give it a name.
- Hit the three-dot menu button and select Edit.
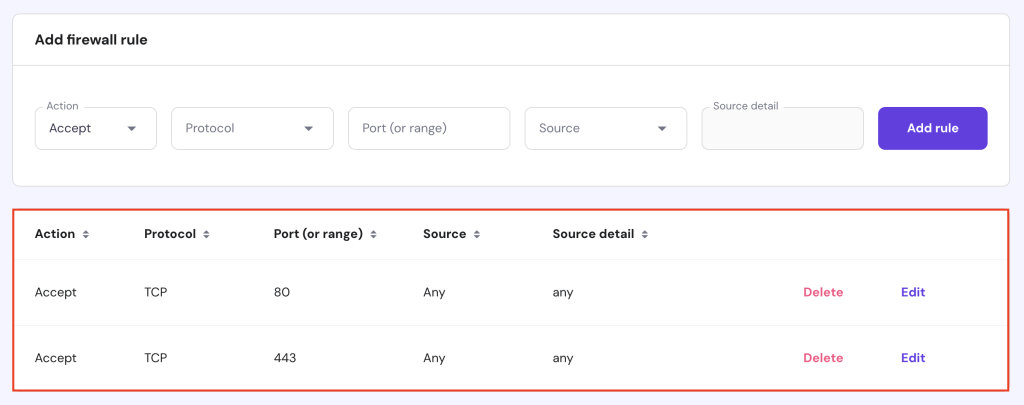
- In the Add Firewall Rule section, set Protocol to TCP and Port (or range) to 80. Then, click Add Rule.
- Repeat the same process for the 443 (TCP) port.
- Hit the Back button and click the toggle to activate it.
- Make some DNS adjustments for your domain. If you bought one from Hostinger, check our guide on how to point a domain name to VPS to complete the process.
2. Install Necessary Dependencies
To set up your Bluesky PDS, you need to install several dependencies on your server. Here’s how to do so:
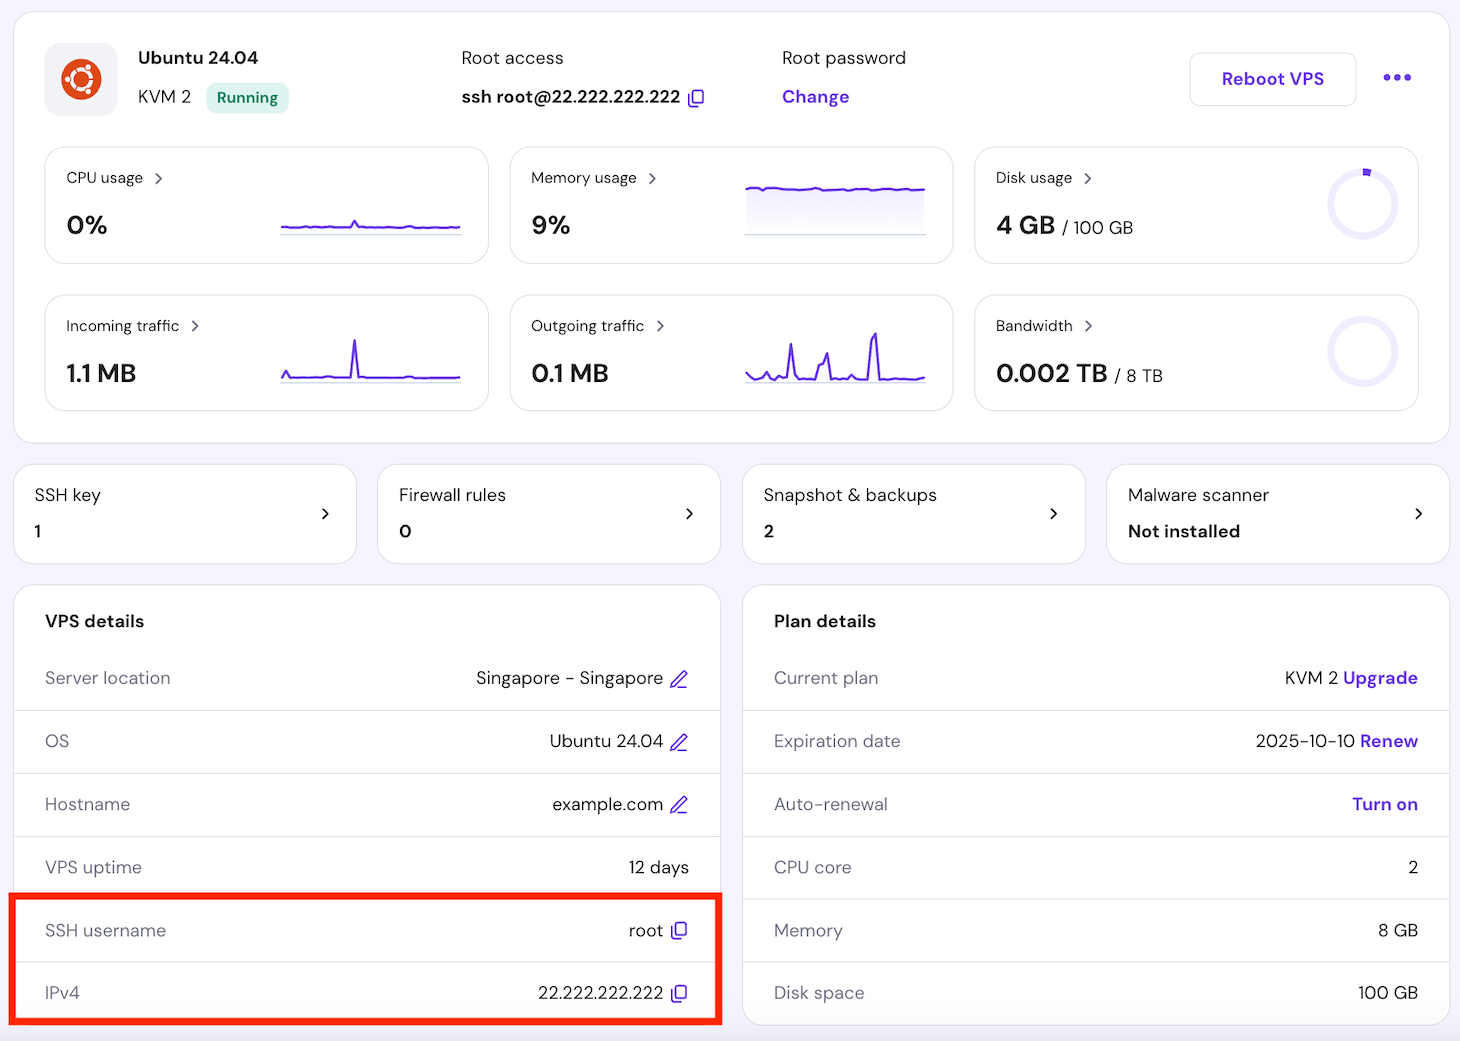
- Obtain your server’s SSH details. Hostinger customers can find these under the VPS Overview menu’s VPS details section.
- Open an SSH client like PuTTY or any terminal emulator to connect to your VPS with your credentials.
- Update and upgrade your server to get the latest security patches and software improvements:
sudo apt update

sudo apt upgrade -y
- Install the required packages and dependencies to run your Bluesky server. These include transport protocols, certificate authorities, and various utilities:
sudo apt install -y apt-transport-https ca-certificates curl python3-websocket software-properties-common wget
3. Clone the Bluesky PDS GitHub Repository
Next, clone the Bluesky PDS source code from the official repository. Follow the instructions to download the latest version of the necessary files and related resources:
- Use Git to clone the Bluesky PDS repository from GitHub:
git clone https://github.com/bluesky-social/pds.git
- You should see an output indicating the cloning process was successful:
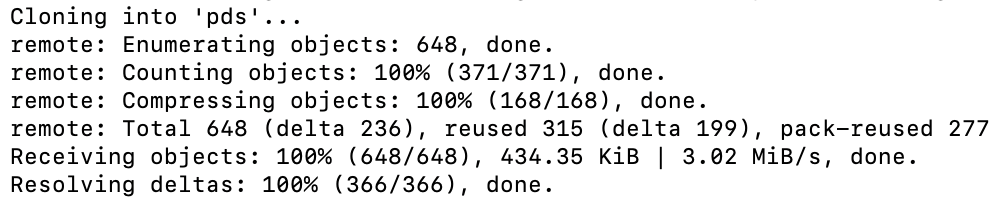
- Run the following command to navigate to the cloned repository’s directory:
cd pds
4. Run the Bluesky PDS Installer
Bluesky provides an installer script to set up your personal data server. It eliminates the need for manual configuration and reduces the risk of unwanted errors. Follow these steps:
- Since you have cloned the Bluesky PDS files, run the installer directly with bash:
sudo bash installer.sh
- If you haven’t downloaded the Bluesky source code, get the installer file using wget and then run it with the same bash command:
wget https://raw.githubusercontent.com/bluesky-social/pds/main/installer.sh

sudo bash installer.sh
- During the installation process, you’ll be prompted to enter the correct domain name and admin email address.
- Here’s the expected output after the installation is complete:

- Create a new user account for your PDS:
sudo pdsadmin account create
- Fill in the user’s email address and handle name when prompted.
- Bluesky PDS will generate a unique password for the account. Store it securely, as you’ll need it later.
5. Launch Your Bluesky Server
After installing Bluesky PDS, it’s time to launch your own server and ensure everything is working correctly:
- Verify that your server is running by requesting the health check endpoint. Replace domain.tld with your domain address:
curl https://domain.tld/xrpc/_healthv
- You should receive a JSON response indicating the server version, similar to:
{"version": "0.4.32"}
- Make sure WebSockets are also functioning correctly. This is crucial for real-time communication:
wsdump "wss://domain.tld/xrpc/com.atproto.sync.subscribeRepos?cursor=0"
- Here is the output you should see:

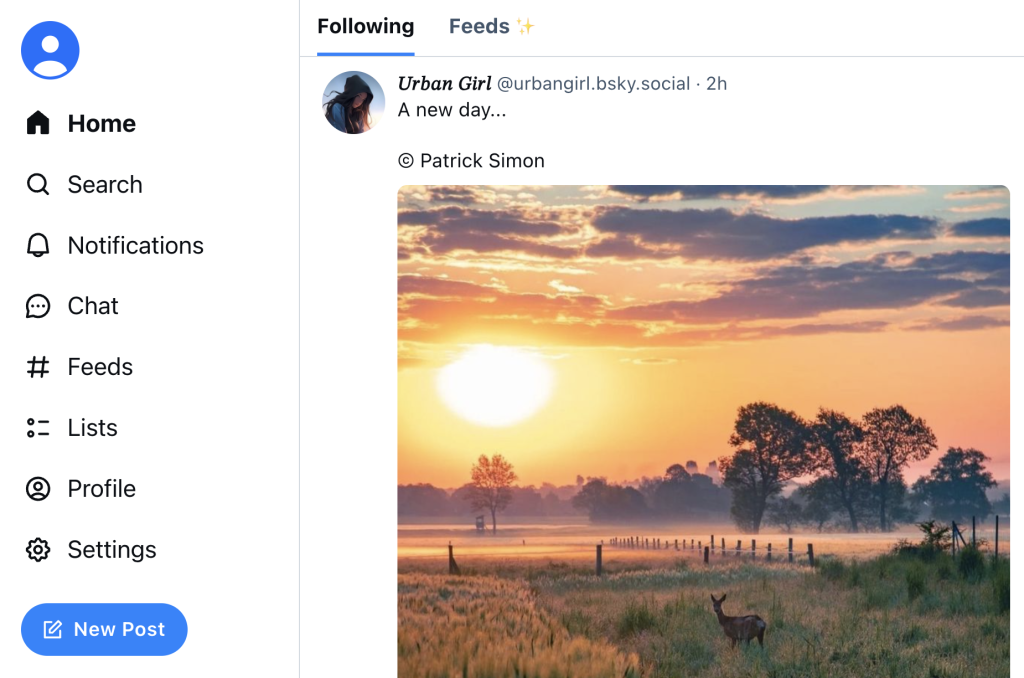
- If there are no issues with the above commands, open your Bluesky server via your domain name on your web browser:

6. Access Your Bluesky PDS
Once you’re done with the Bluesky PDS setup, you can allow users to join your server. Follow the instructions below:
- Open the Bluesky app on your preferred platform, whether web app, Android, or iPhone. Here, we demonstrate using the web app.
- Hit Sign In to log in using your previously created account.

- Under the Choose Service section, select Custom. Then, enter your domain name as the server address and hit Done.
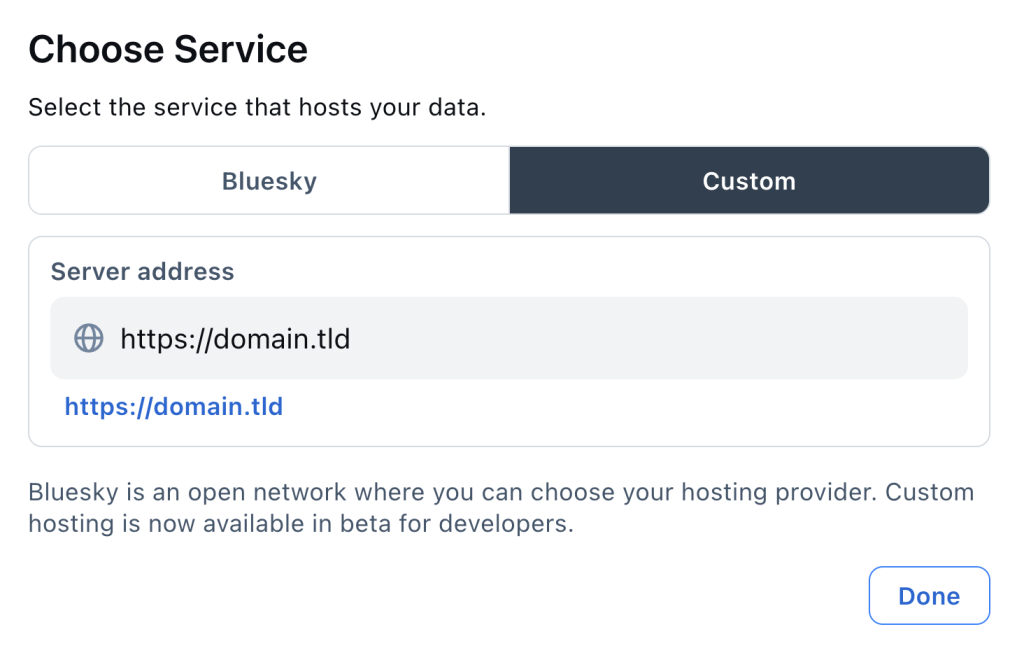
- Fill in your email address and password, and then click Next.
- You’ll be directed to the homepage, showing posts from people you follow and trending content.
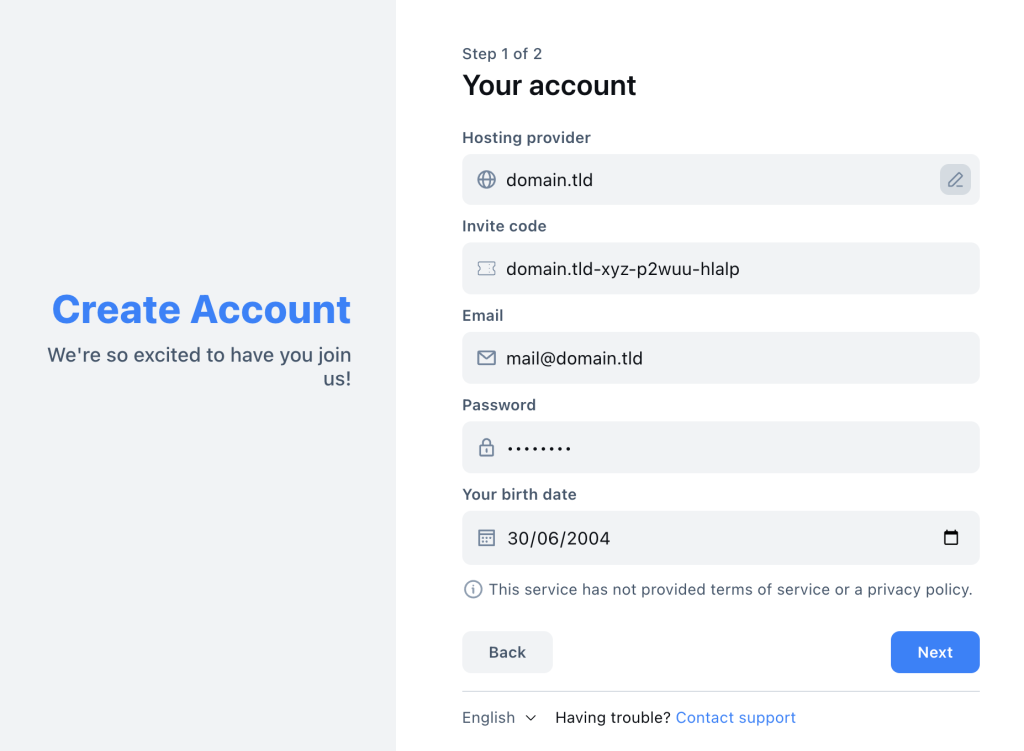
- To invite your friends and colleagues, you need to generate a unique invite code. Type the following command for each invite:
sudo pdsadmin create-invite-code
- Share the individual invite codes with new users so they can join your custom PDS.
7. Manage and Secure Your Server
Proper management and security of your Bluesky PDS is a crucial step to providing a safe environment for your community. Here’s how to keep your server updated and secure:
Updating the PDS
Regular updates keep your Bluesky PDS running smoothly and securely. Sometimes, updates also include new features, enhancing users’ experiences.
To update your Bluesky PDS, execute the following command:
sudo pdsadmin update
Configuring SSL/TLS
SSL/TLS protects communication between your server and its users. Installing an SSL certificate encrypts data transferred to and from your server, protecting it from potential eavesdroppers.
You can use Let’s Encrypt to obtain a free SSL certificate. Use the following commands and replace domain.tld with your domain name:
sudo apt install certbot

sudo certbot certonly --standalone -d domain.tld
Conclusion
In this article, you’ve learned how to host a Bluesky server on a VPS. From selecting an ideal VPS service to generating invite codes for users and installing SSL certificates, you can now create a secure and efficient personal data server.
By self-hosting your PDS, you gain greater control over data sharing and can customize your setup to suit your needs. Encourage your friends and communities to join your server and enjoy the benefits of decentralized social media networking.
How to Host a Bluesky PDS FAQ
This section answers the most common questions about Bluesky Personal Data Server setup.
What Is Bluesky PDS?
Bluesky PDS is a decentralized server that allows users to manage their social media data independently, ensuring better control and privacy. It supports federated networking and data distribution.
Can I Customize My Bluesky PDS Setup?
Yes, you can customize your Bluesky PDS setup using the pdsadmin command. This tool allows you to configure various aspects of your server, such as creating user accounts, generating invite codes, and requesting crawls from a relay host.
Which VPS Provider Is Best for Hosting a Bluesky PDS?
Hostinger’s VPS is highly recommended for hosting a Bluesky PDS due to its powerful hardware specifications, comprehensive security features, and multiple data center locations, ensuring a smooth social networking experience with Bluesky.

Ariffud is a Technical Content Writer with an educational background in Informatics. He has extensive expertise in Linux and VPS, authoring over 200 articles on server management and web development. Follow him on LinkedIn.


Comments
November 17 2024
Thanks so much for this tutorial - it totally got me off the ground. I do have a question, though - if I wanted to serve a different page as the root / home page instead of the weird text page that is there, how would I do that?
November 29 2024
I'm glad the tutorial was helpful! To serve a custom page as your root/home page instead of the default one, you can start by navigating to the Bluesky PDS directory where your server files are located. Look for the file handling the routes, such as server.js, app.js, or a similar file. You can use the command
grep -r "app.get('/" .to locate it. Once you've found the file, open it with a text editor like nano and look for the handler for the / route. Update the code to serve your custom HTML, for example:app.get('/', (req, res) => { res.send(` Welcome to My Bluesky PDS Welcome to My Bluesky PDS! This server powers my Bluesky activities. Learn more here. `); });