How to install Ollama for fine-tuning machine learning models efficiently
Ollama is ideal for securely running large language models locally, providing strong data privacy, and reducing costs by eliminating cloud dependencies. It’s especially valuable for industries requiring data confidentiality, like healthcare and finance, while also supporting customization for specific use cases.
In this article, we’ll explain the process of installing Ollama step-by-step. You’ll learn how to download the installation package from GitHub, install it on your VPS, and perform first-time configuration so that everything runs smoothly.
As a bonus, we’ll also show you how to cut down this whole setup time to just a few seconds with Hostinger.
What is Ollama?
Ollama is an open-source platform that lets you run fine-tuned large language models (LLMs) locally on your machine. It supports a variety of popular LLMs, including Llama 2, GPT-3.5, and Mistral. By integrating AI capabilities into your applications locally, Ollama enhances security, improves privacy, and provides greater control over the model’s performance.
With Ollama, you can manage model weights, configurations, and datasets through a user-friendly interface. This makes it easier to tailor language models to specific use cases. In many ways, it’s a dream come true for developers who like to experiment with AI.
But, if you want to integrate Ollama into your web applications without relying on third-party APIs, you have to set it up in your hosting environment first.
Prerequisites for installing Ollama
Before you begin the installation process, you need a few things to install Ollama on your VPS. Let’s look at them now.
VPS hosting
To run Ollama effectively, you’ll need a virtual private server (VPS) with at least 16GB of RAM, 12GB+ hard disk space, and 4 to 8 CPU cores.
Note that these are just the minimum hardware requirements. For an optimum setup, you need to have more resources, especially for models with more parameters.
Operating system
Ollama is designed to run on Linux systems. For the best results, your hosting environment should be running on Ubuntu 22.04 or higher, or the latest stable version of Debian.
Access and privilages
To install and configure Ollama, you need access to the terminal or command line interface of your VPS. You also need to have root access or own an account with sudo privileges in Linux.
Installing Ollama using a Hostinger VPS template
Now that we have covered the prerequisites, let’s explore how you can easily install Ollama onto your VPS using a pre-built template from Hostinger.
Hostinger has simplified the Ollama installation process by providing a pre-configured Ubuntu 24.04 VPS template for only ₹429.00/month.
It comes with Ollama, Llama 3, and Open WebUI already installed. All you have to do is select the template, wait for the automatic installer to finish, and log into your server to verify the installation.
Here’s how it works:
- Log into your Hostinger account and access the hPanel.
- Navigate to the VPS section and select your VPS instance.
- Click on the Operating System → Ubuntu 24.04 with Ollama.
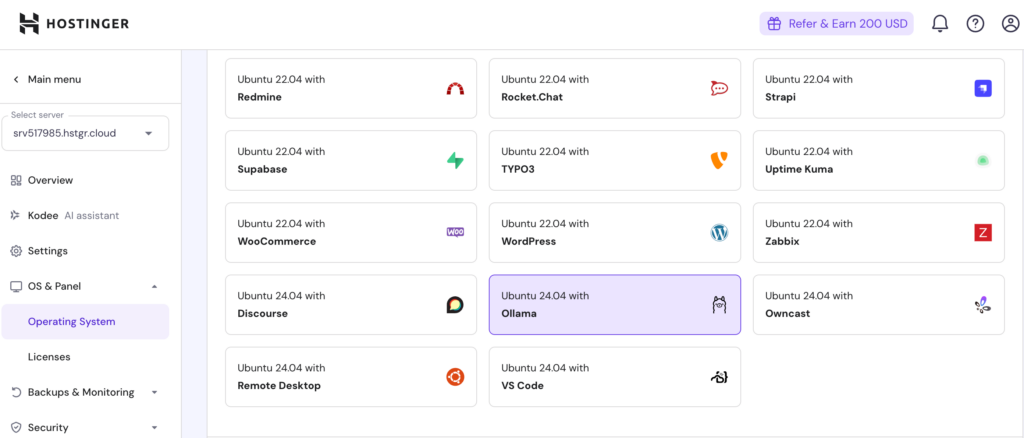
- Wait for the installation to complete.
- Log into your VPS using SSH to verify the installation.
That’s it! You should now be ready to start using Ollama on your Hostinger VPS to power your web applications.
Since the template already has all the requisite tools and software pre-installed and configured, you don’t need to do anything else before diving into the LLMs.

Installing Ollama on a VPS manually
If you want to run Ollama on your VPS but use a different hosting provider, here’s how you can install it manually. It’s a more complicated process than using a pre-built template, so we will walk you through it step by step.
1. Update system packages
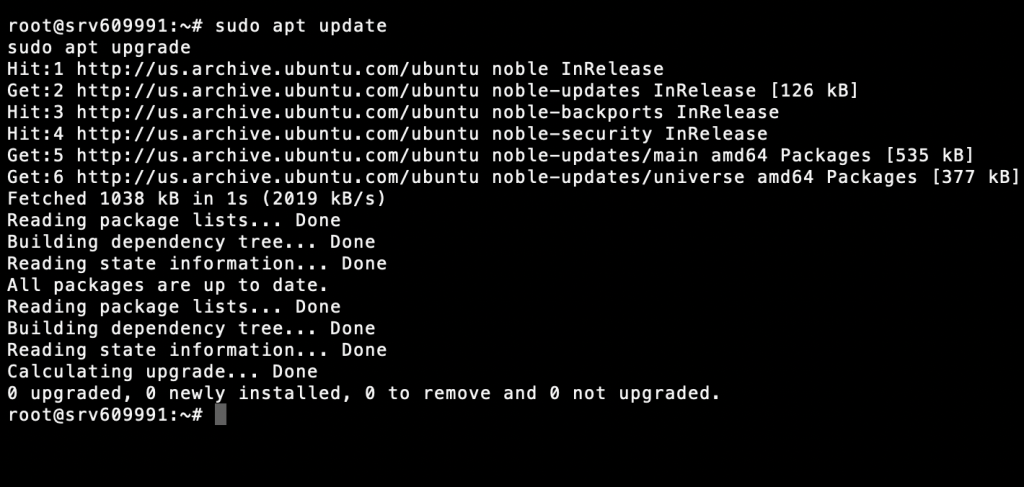
You need to make sure your VPS is up-to-date before you install any new software. To update your package list and upgrade the installation packages, run the below commands using your server’s command line:
sudo apt update

sudo apt upgrade
Keeping your system up to date helps avoid compatibility issues and ensures a smooth installation from beginning to end.
2. Install required dependencies
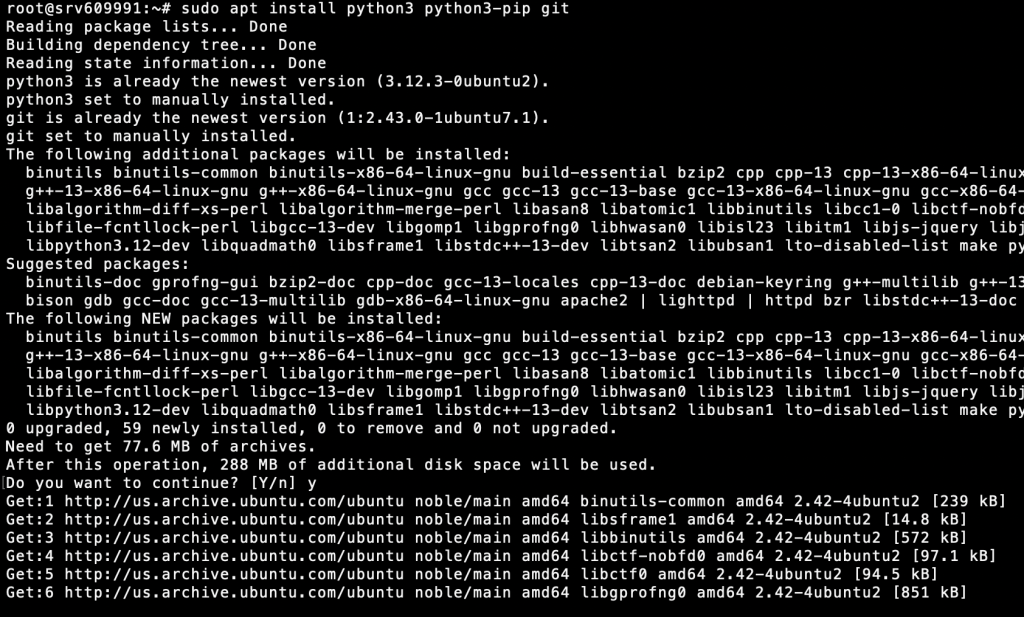
Ollama requires certain dependencies to run smoothly. These include the latest versions of Python, Pip, and Git. To install them, run this command:
sudo apt install python3 python3-pip git
Verify that the installation has been successfully completed by running:
python3 --version

pip3 --version

git --version
If your VPS has an NVIDIA GPU, you’ll need additional CUDA drivers to take advantage of the GPU’s enhanced performance. But these steps will vary depending on your server configuration. Follow the official NVIDIA guide on downloading the CUDA Toolkit to learn more.
3. Download the Ollama installation package
Up next, download the Ollama installation package for Linux from its official website. You can do this by running:
curl -fsSL https://ollama.com/install.sh | sh
This will download and install Ollama on your VPS. Now, verify the installation by running:
ollama --version

4. Run and configure Ollama
Now you should be able to run Ollama anytime you want, by using the following command:
ollama serve
Before you proceed any further, you should check the current status of the Ollama service by running this on your CLI:
systemctl status ollama
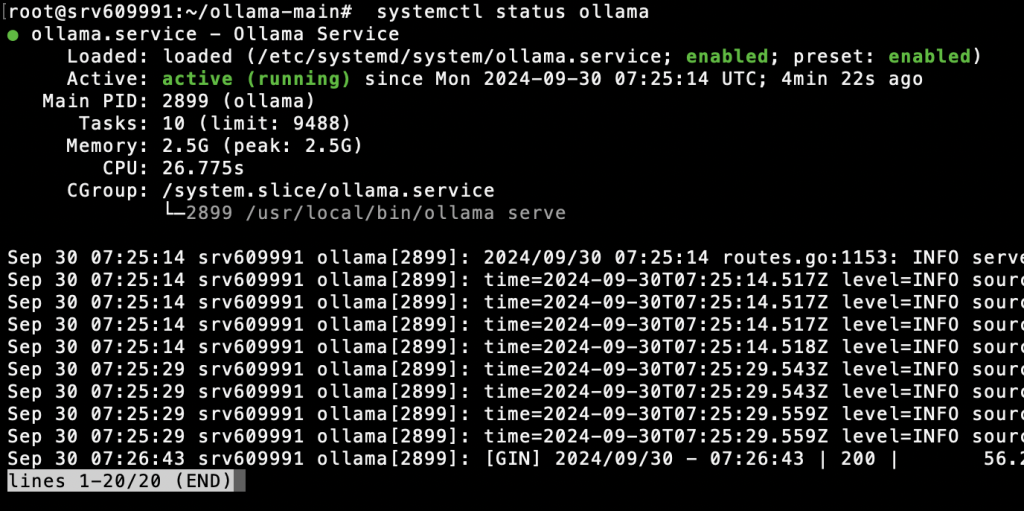
If you’re a Hostinger VPS customer, you can also use Kodee AI Assistant to confirm if Ollama is already running on your server. From your VPS dashboard, open the Kodee menu via the left sidebar. Then, type your prompt like “Can you check if Ollama is running on my server?”
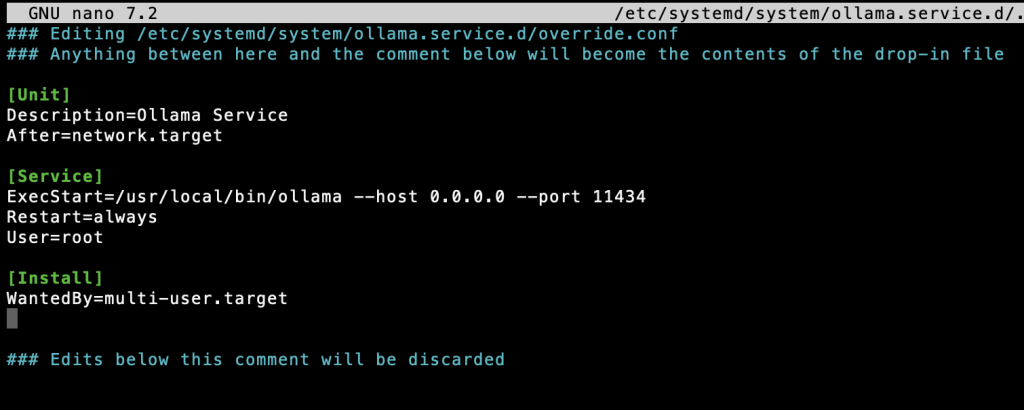
Next, create a systemd service file so Ollama runs automatically each time you boot up your VPS:
sudo nano /etc/systemd/system/ollama.service
Add the following contents to your systemd service file:
[Unit]

Description=Ollama Service

After=network.target

[Service]

ExecStart=/usr/local/bin/ollama --host 0.0.0.0 --port 11434

Restart=always

User=root

[Install]

WantedBy=multi-user.target
After that, use the following command to reload the environment:
systemctl daemon-reload

systemctl restart ollama
And you’re done! Ollama should launch automatically the next time you boot up your VPS.
Note: While it provides many configuration options to modify model behavior, tune performance, and change server settings, Ollama is designed to run out-of-the-box using its default configuration.
This configuration works well for most scenarios, so you can get started right away by fetching your necessary model files. You can do that by running “ollama pull <model_name>”.
Conclusion
Now that you’ve successfully installed Ollama on your VPS, you have access to a host of tools to fine-tune a variety of large language models before running them locally on your server. Ollama opens up a world of possibilities for developers, researchers, and AI enthusiasts alike.
Some of the most common use cases for Ollama include building custom chatbots and virtual assistants to serve specific needs. For example, you can build your own coding assistant to assist with web and mobile application development, create a brainstorming partner for design-focused projects, or explore the possibilities of large language models in content strategy and creation.


