How to edit a WordPress site: a comprehensive guide for beginners
Navigating WordPress is not always simple, especially if you’re new to building websites. However, with the right guidance, managing your WordPress site can be less intimidating than it seems.
In this guide, you’ll explore the available tools for editing your site – from the default WordPress editor to page builder plugins – and learn how to update each section, including the header, footer, and content areas.
We’ll also share best practices to help keep your site secure and efficient while you make changes. By the end, you’ll feel confident handling your WordPress site like a pro. Let’s begin.
Overview of ways to edit a WordPress site
There are several ways to edit a WordPress website. Before we get into more detail, let’s briefly explore each method individually.
Site Editor
Ideal for: Block themes, holistic site design, beginners seeking visual control.
Think of the Site Editor as a canvas where every element from header to footer becomes a movable, customizable block within a cohesive system.

With the Site Editor, you can:
- Create consistent visual identity across all site areas.
- Modify site-wide elements like typography and colors.
- Build custom templates for different content types.
- Preview changes in real time.
The only limitation is that the Site Editor requires you to be on a block theme. Users with classic themes won’t have access to this environment.
Customizer
Ideal for: Classic themes, targeted adjustments, users who still run legacy WordPress themes.
The Customizer is the traditional way to edit WordPress sites built with classic themes. It offers a more structured approach to site editing.
For instance, it provides a live preview of changes, allowing you to tweak settings like site identity, colors, and menus before publishing.
While the Customizer works with all traditional themes, it offers much less creative flexibility than the Site Editor.
You need to work within the customization options provided by the theme developer.
This complexity is further amplified by the fact that any advanced customization typically requires CSS knowledge. That can limit how far you can go in terms of customizing your website, depending on your technical skills.
Page builders
Ideal for: Block and classic themes, beginner-to-advanced users.
Page builders (like Elementor, Beaver Builder, Divi, and many others) are third-party plugins that offer a drag-and-drop interface for designing custom layouts.
They provide pre-built templates, advanced styling options, and more flexibility than both the Site Editor and Customizer.
Page builders offer extensive template libraries, advanced styling controls beyond native WordPress capabilities, specialized modules for complex functionality, and responsive design for different device sizes.
They work with both classic and block themes, which make them a popular choice for users who want highly customized designs without coding.
However, premium page builder plugins can be expensive. Also, some of them may slow down website performance if not optimized properly.

How to edit a WordPress theme
In this section, we’ll examine simple ways to change the appearance of your theme, including adjusting colors, fonts, layouts, and spacing to match your style.
Using the Site Editor
The Site Editor lets you modify your theme’s visual design through blocks, colors, typography, and spacing without writing code.
With Global Styles, you can adjust site-wide settings such as colors, typography, and layout. Here’s how:
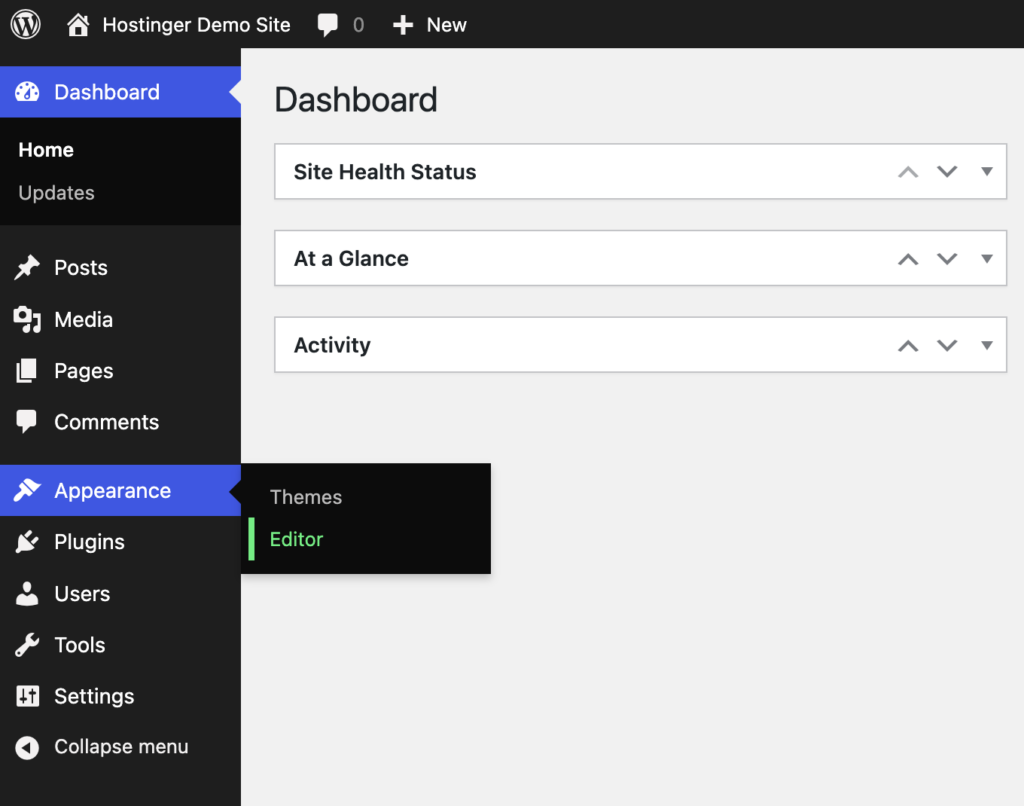
Go to Appearance → Editor in your WordPress dashboard. Then, head over to the Styles section on the left panel.
Click the Edit Styles icon at the top of this panel to edit the presets. You can preview different color schemes and combinations before choosing a suitable option.
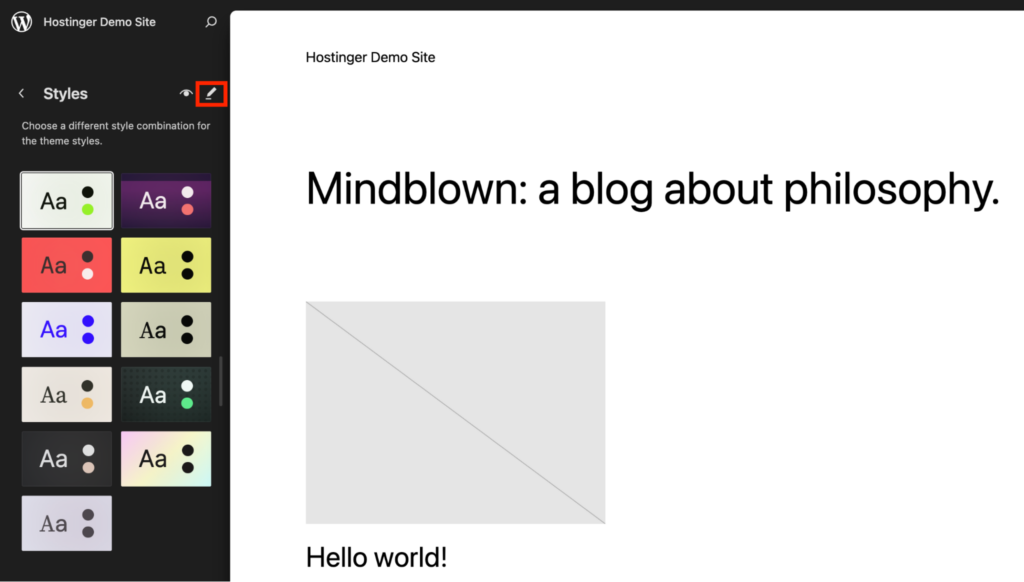
This will open the styles panel on the right of your screen. Access the Global Styles settings and make changes to your preferences.
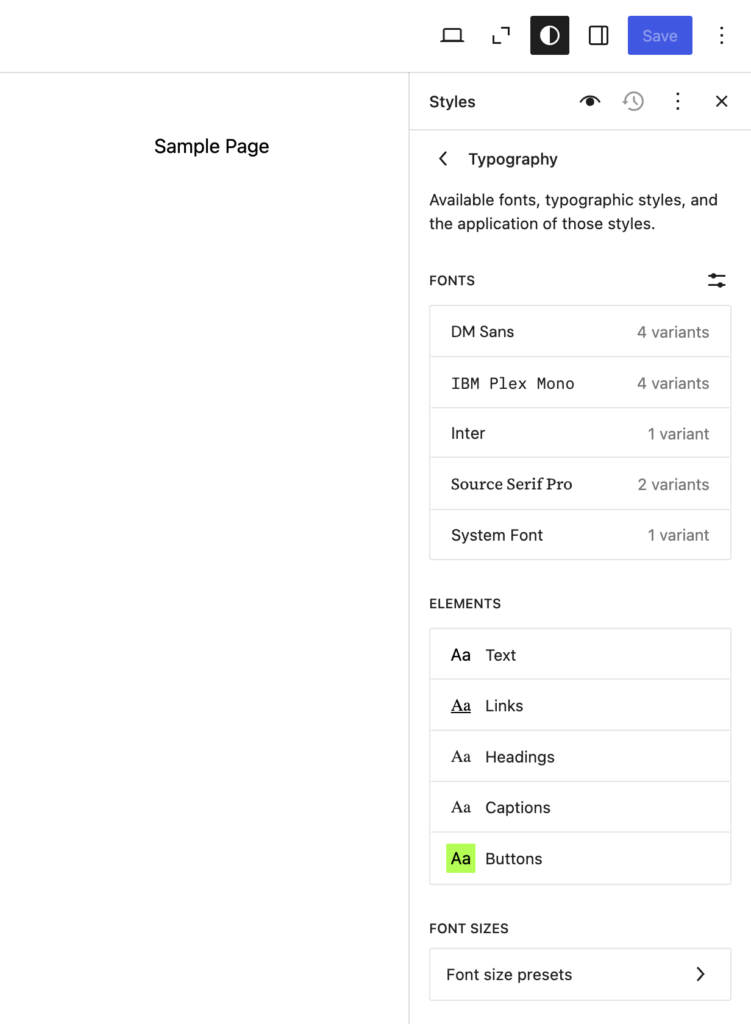
Here’s what you can customize:
- Typography: Choose the font family, size, line height, weight, letter spacing, and more. You can also customize the heading styles and create a specific style for links. Add your custom fonts to create a unique style.
- Colors: Change the colors of the text and background from a preset palette or use the custom color picker. You can also modify the accent colors for buttons or highlighted elements.

- Layout: Set the default width for content blocks and configure the spacing between different elements.

Using the Customizer
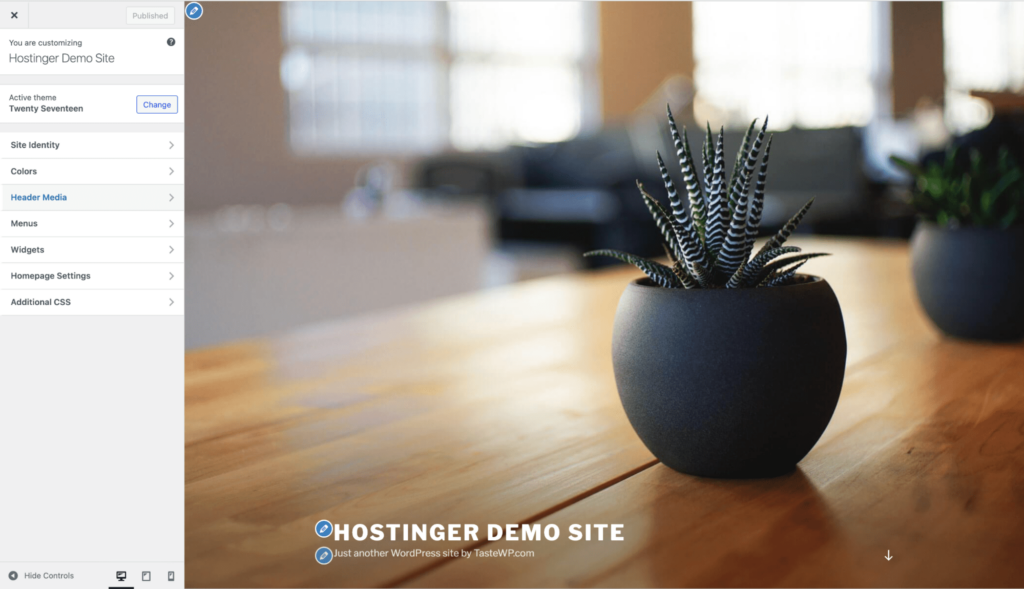
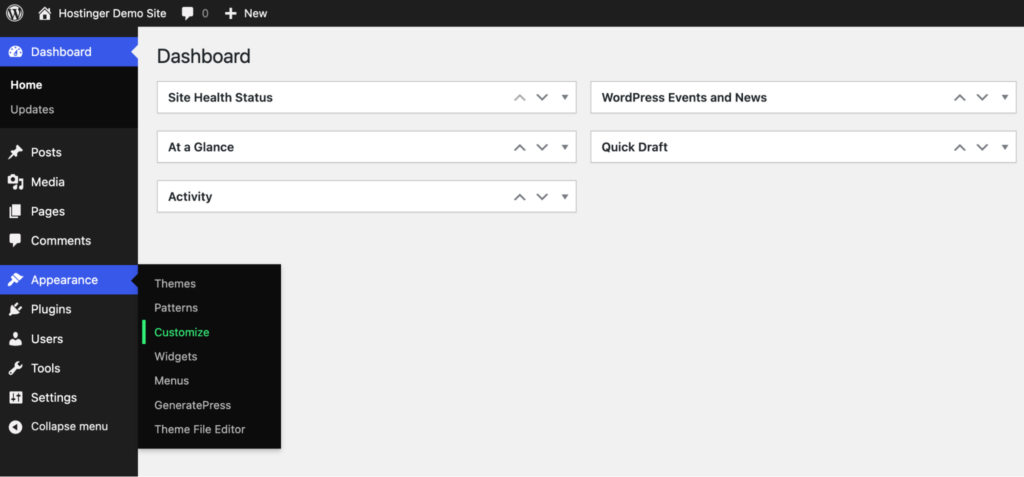
Customizer is the default editing tool for classic themes. Here’s how you can customize your WordPress theme with it:
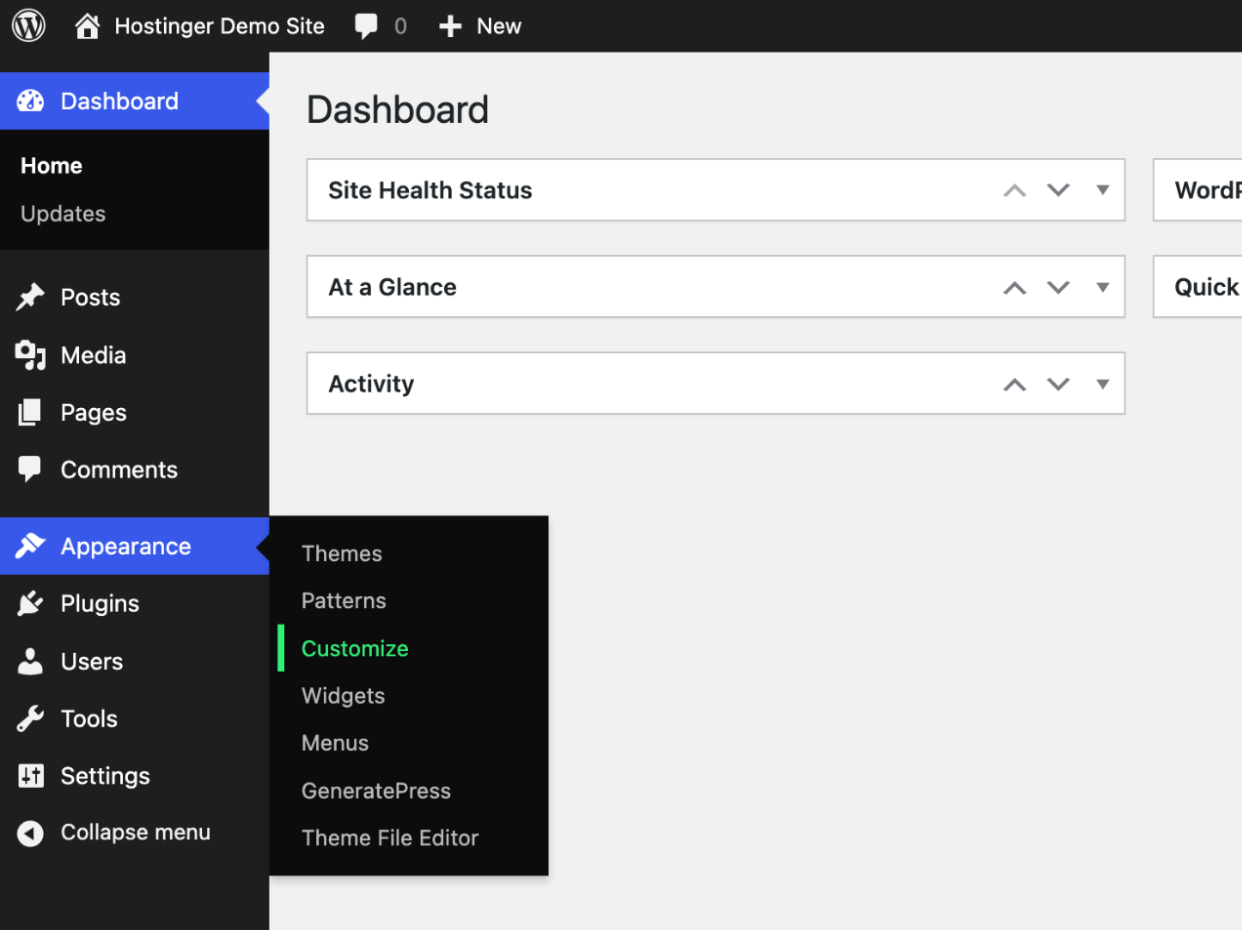
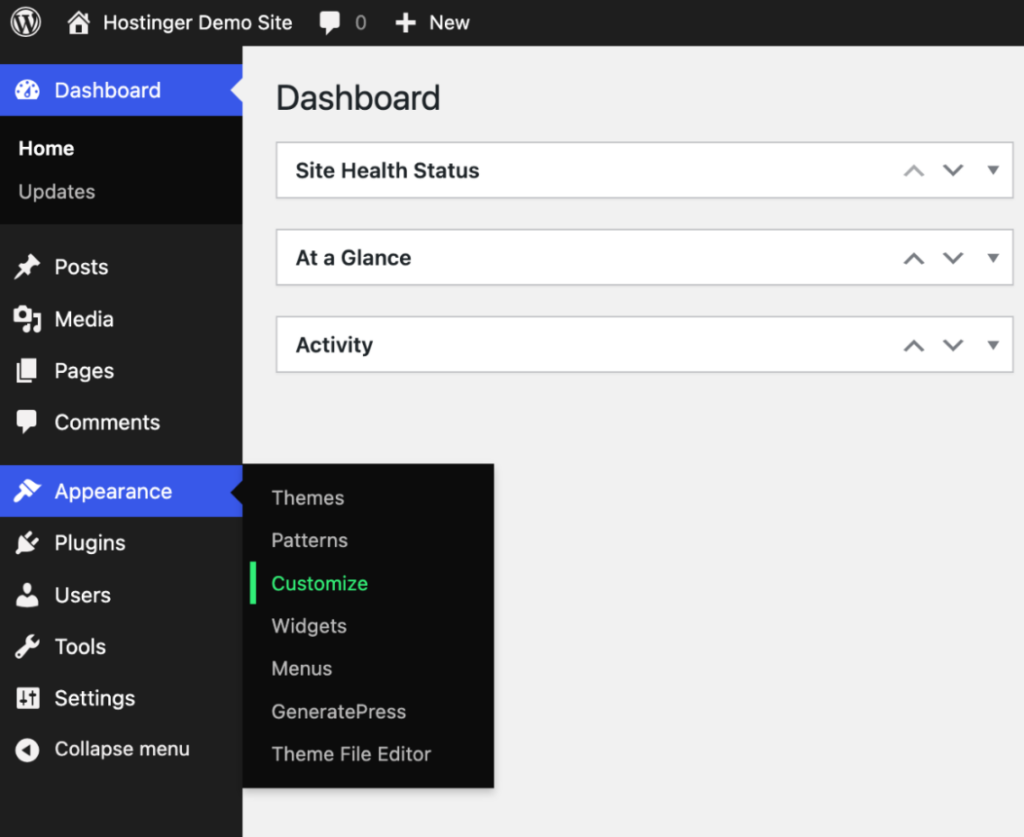
Go to Appearance → Customize in your WordPress dashboard.

You should now be redirected to the home page, which has a left sidebar with different customization options. These options depend on the theme you’re customizing.
In general, you’ll see these options:
- Color palette: Adjust your site’s visual identity by selecting brand colors for backgrounds, text, buttons, and links. Strategic color choices establish mood and guide user attention to important elements.
- Typography settings: Control the reading experience by selecting fonts, sizes, and spacing. Your typography choices can affect how visitors perceive your brand.
- Button customization: Design call-to-action elements to drive conversions. Adjust colors, borders, hover effects, and text styling to create buttons that stand out and encourage clicks.
- Layout controls: Define the structural foundation of your site by adjusting content width, sidebar positions, and spacing between elements. These settings determine how information flows and how much breathing room your content has.

Using a page builder plugin
Elementor and Beaver Builder are powerful page builder plugins that help you design your website and change your theme.
First, you’ll need to complete a simple setup process:
- Installation: Navigate to Plugins → Add New in your WordPress dashboard, search for your chosen page builder, and click Install Now, followed by Activate.
- Initial configuration: Most page builders will guide you through an onboarding process where you’ll select preferences for default colors, fonts, and responsive settings. These baseline choices establish your design foundation.
- License activation: Premium versions require activating your license key to unlock advanced features and templates. This typically involves entering your purchase code in the plugin’s settings area.
Once this is done, you’re ready to begin customizing your page.
We’ll use Elementor for this walkthrough.
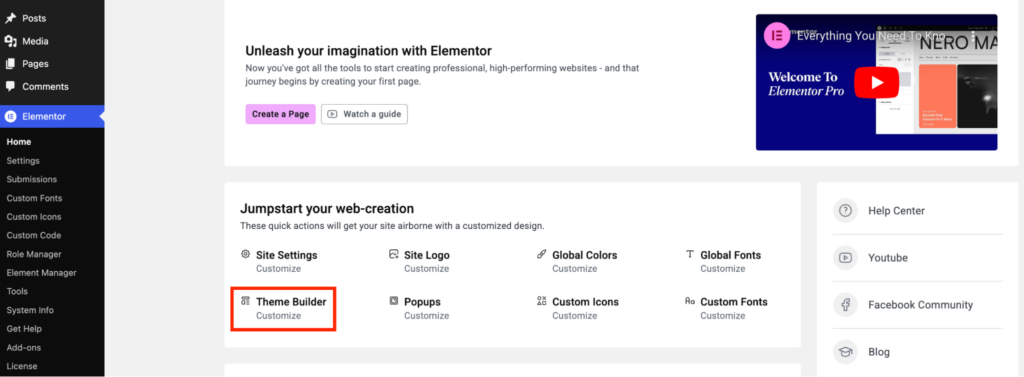
Click Elementor from the dashboard sidebar → Theme Builder → Customize.

You’ll be redirected to the theme builder page, where you can customize individual parts of your theme.
Here’s what you can customize:
- Header: Customize the logo, menu, and call-to-action buttons in the header. You can adjust spacing, layout, and style to ensure your branding stands out.
- Footer: Add copyright text, navigation links, and social media icons to the footer. Customize its background, typography, and alignment to match your design.
- Single Post: Design the layout for individual blog posts. You can style the title, author name, featured image, and content to create a unique reading experience.
- Single Page: Customize pages like About or Contact. Control the layout, font styles, and background to align with your site’s branding.
- Archive: Style archive pages that display grouped content, such as categories or tags. You can customize headings, post excerpts, and layout options.
- Search Results: Personalize the look of search results pages. You can format headings, result summaries, and pagination for clarity and easy navigation.
- Loop Item: Adjust how individual posts appear in a list or grid. Style the title, image, and meta details for consistent formatting.
- Error 404: Design the page users see when they encounter a broken link. Add helpful text, a search bar, or links to guide them back to your site.
How to edit the homepage in WordPress
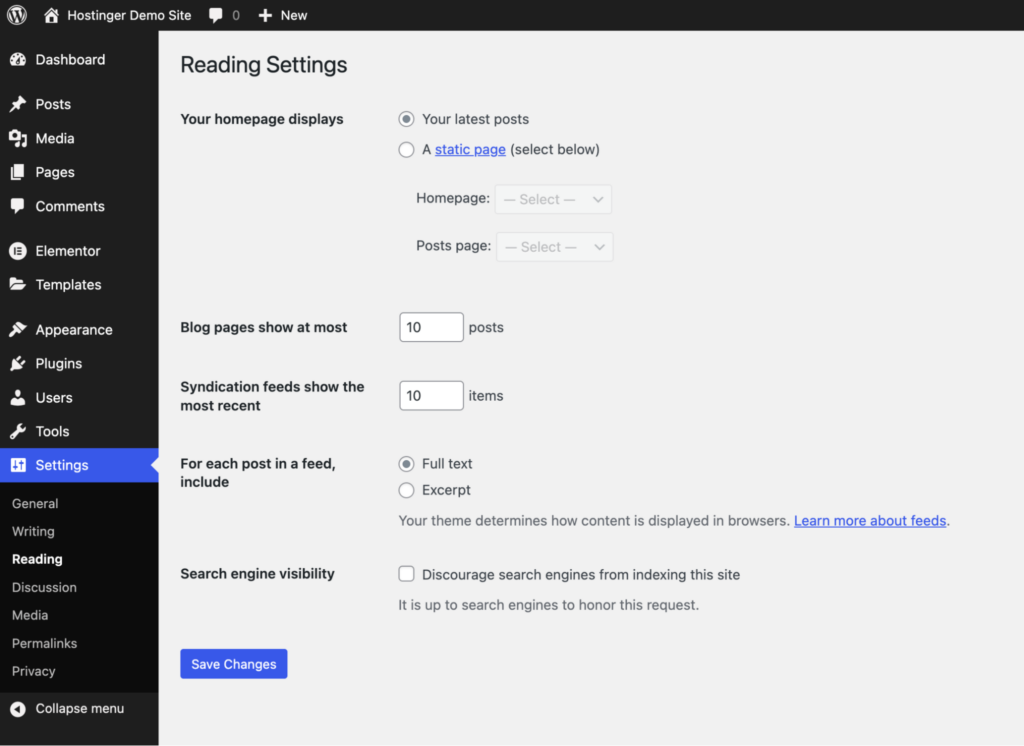
WordPress lets you pick any page as your homepage. Here’s how you can configure it.
Go to Settings → Reading on your WordPress dashboard. Under Your homepage displays, choose Your latest posts or select A static page. Click Save Changes.
Now, let’s look at different ways to edit your WordPress homepage.
Using the Site Editor
Here are the steps to edit your homepage using the Site Editor:
Go to Appearance → Editor on your WordPress dashboard.
You should now see the homepage on the right with the design options on the left.
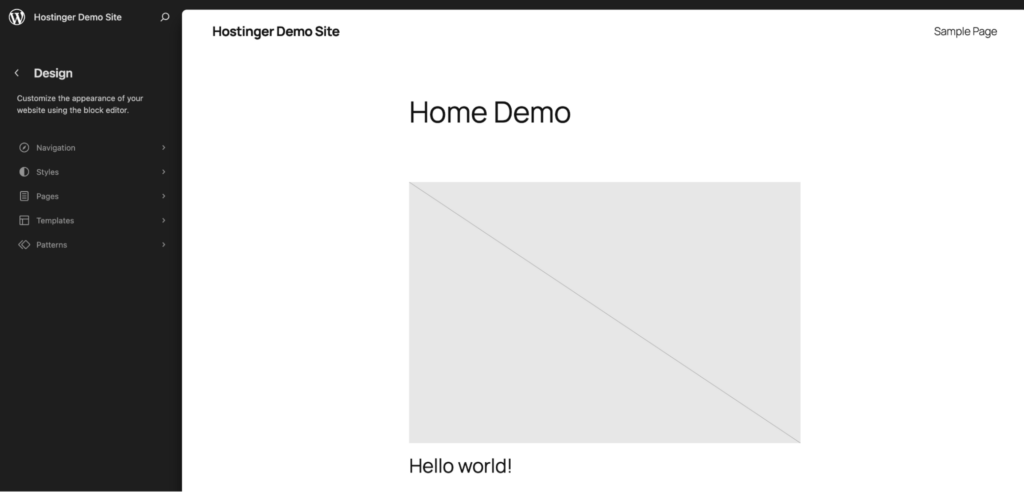
Click on the homepage. You can now edit the page visually by clicking individual elements.
Press the + icon on the top editing panel beside the WordPress logo to add new blocks, patterns, and media. Here are some essential elements of a good homepage:
- Hero section with a compelling headline.
- Featured products or services.
- Call-to-action buttons.
- Testimonials.
Remember to save your progress and apply the changes by hitting the Save button in the top-right corner.
Using the Customizer
Here’s how you can edit your homepage on a classic theme using Customizer.
Go to Appearance → Customize in your WordPress dashboard.
Open Homepage Settings from the editing panel on the left part of your screen. Choose a specific page or the latest posts as the homepage if you haven’t already defined it.
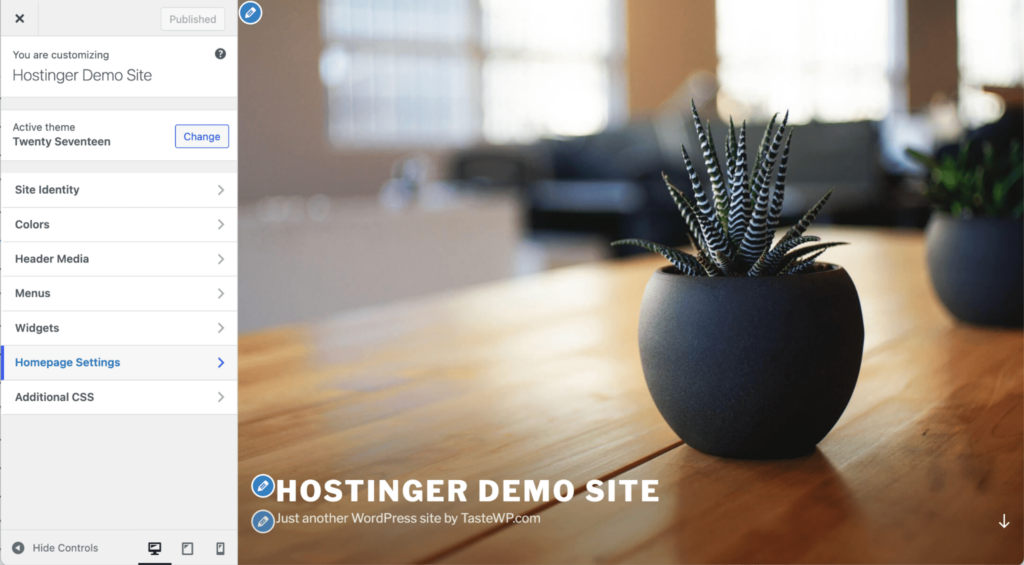
Here’s what you can edit on your homepage:
- Header image or slider settings.
- Background images or patterns.
- Featured content settings.
- Widget areas placement.
- Content layout options.
Using a page builder plugin
To edit the homepage with Elementor, you must first create a page with it and set it as the Home Page via Settings → Reading → A static home page.
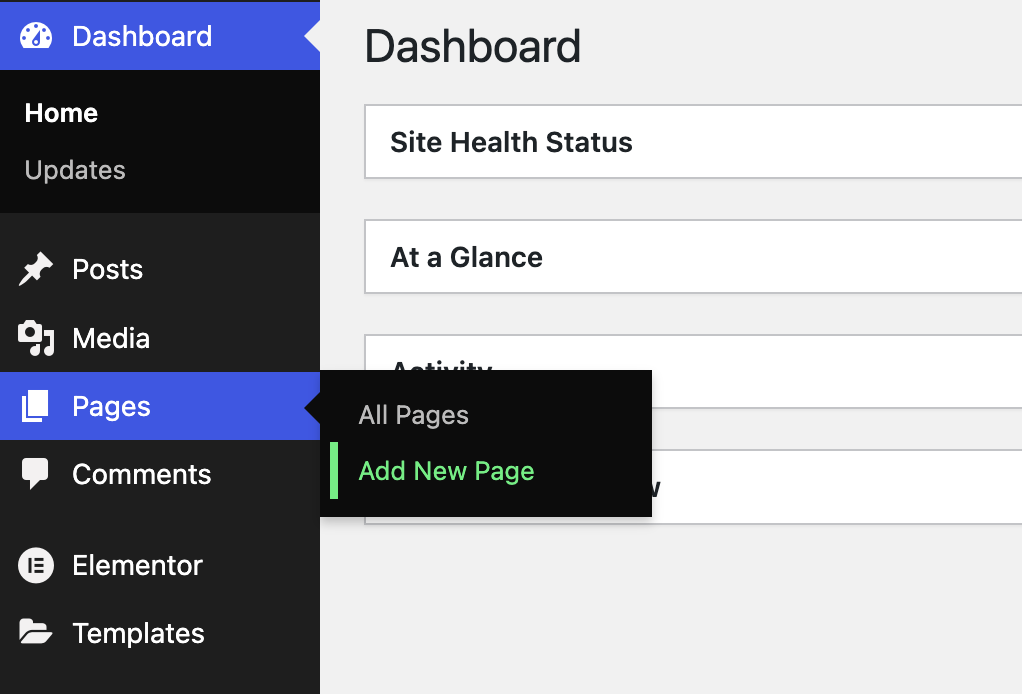
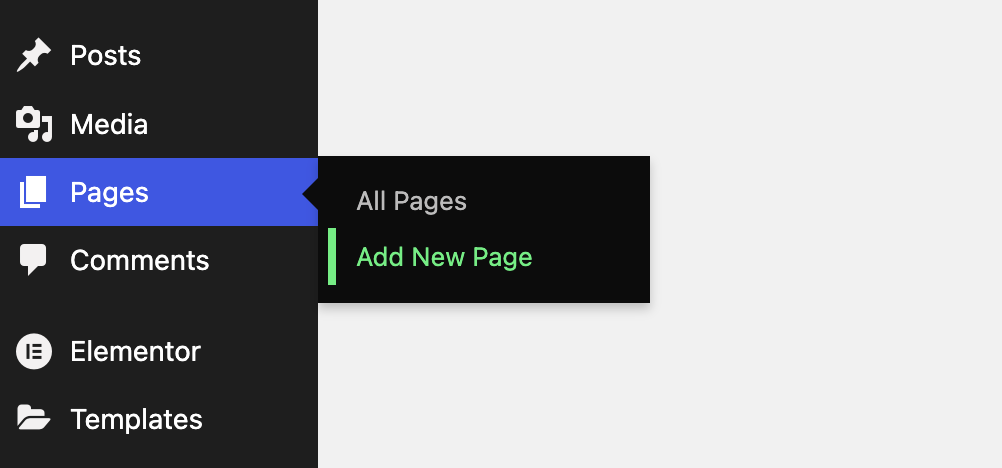
Go to Pages → Add New Page.
Then, click on Edit with Elementor at the top of the page.
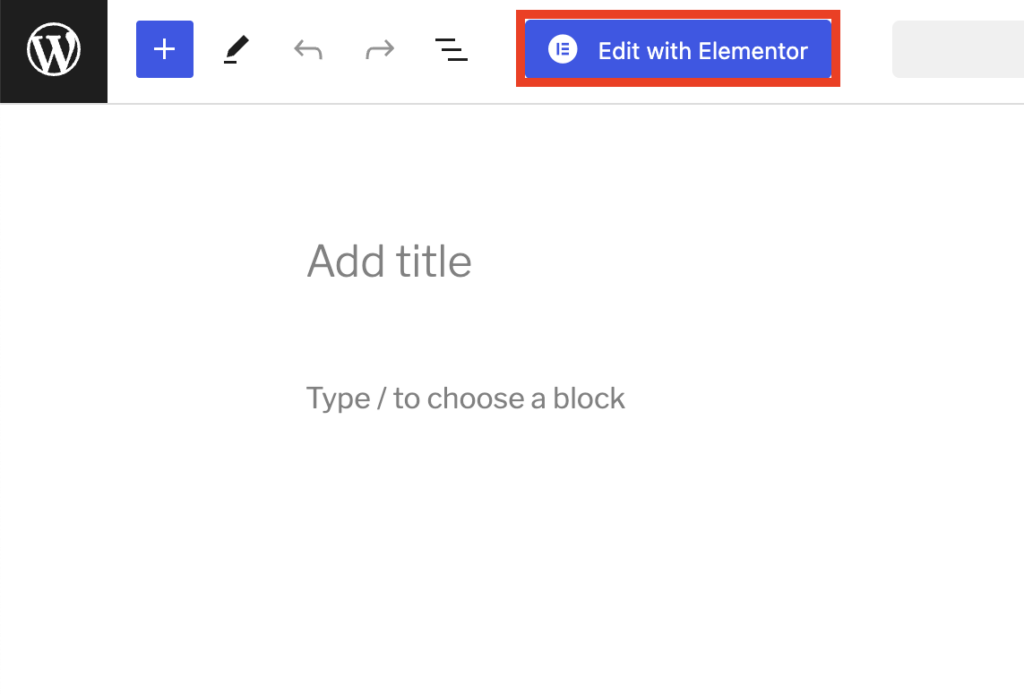
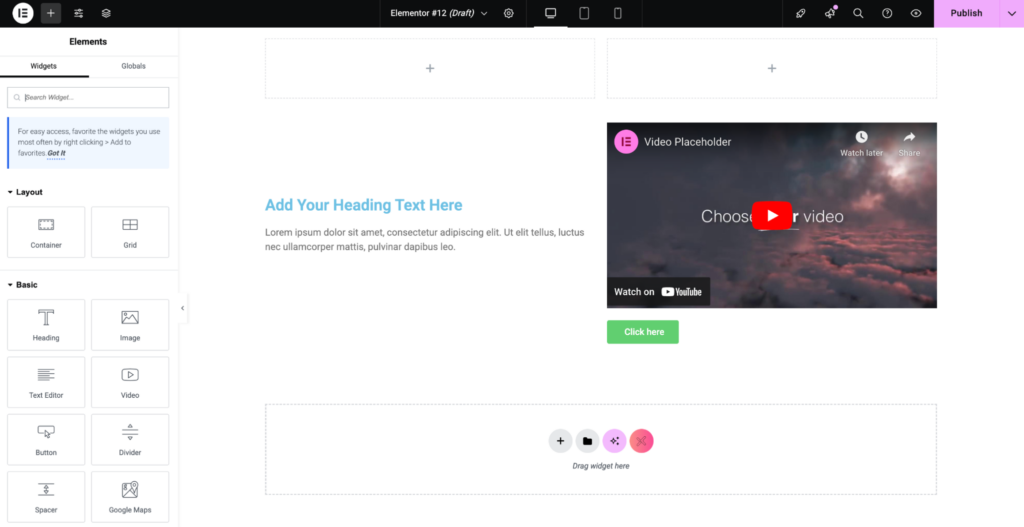
You can now customize your homepage using the modules available on the left panel.
Once this page has been set as the homepage, you should now see an Edit with Elementor button when you visit the homepage while logged in. This lets you edit the homepage with Elementor whenever you want.

You can either start with one of the pre-made templates to speed up the process or open a blank canvas to design everything from scratch.
Begin by organizing your homepage’s elements in order of importance so visitors immediately understand what matters most. Elementor makes this easy with its drag-and-drop interface and specialized sections:
- Welcome area: Use Elementor’s Section tool to create a full-width top banner with a background image, headline, and button. This introduces visitors to your site with visual impact.
- Benefits blocks: Drag in Elementor’s Icon Box widgets to display 3-4 key advantages of your product or service, each with its own icon and a brief description.
- About section: Add an “Image + Text” block to tell your story and include a relevant photo that builds a connection with visitors.
- Testimonials: Insert Elementor’s dedicated Testimonials widget to display customer reviews and ratings to build trust and credibility.
What makes Elementor useful for beginners is that you can see every change instantly as you make it. You can also customize everything from spacing to colors by clicking directly on any element and using the side panel options.
How to edit the header and footer
Headers and footers function as your site’s structural framework. They appear on every page of your site to create consistency and orientation.
Headers typically include your site’s navigation system, making content easy to explore. Footers, on the other hand, include essential trust elements like contact information and links to legal documentation.
Together, they create an experience that helps visitors confidently navigate your site regardless of which page they’re viewing.
Let’s explore how to edit your website’s header and footer.
Using the Site Editor
The Site Editor offers multiple templates for your site’s header and footer. Here’s how to edit these elements:
Go to Appearance → Editor in your WordPress dashboard.

Click Patterns from the editing panel on the left.
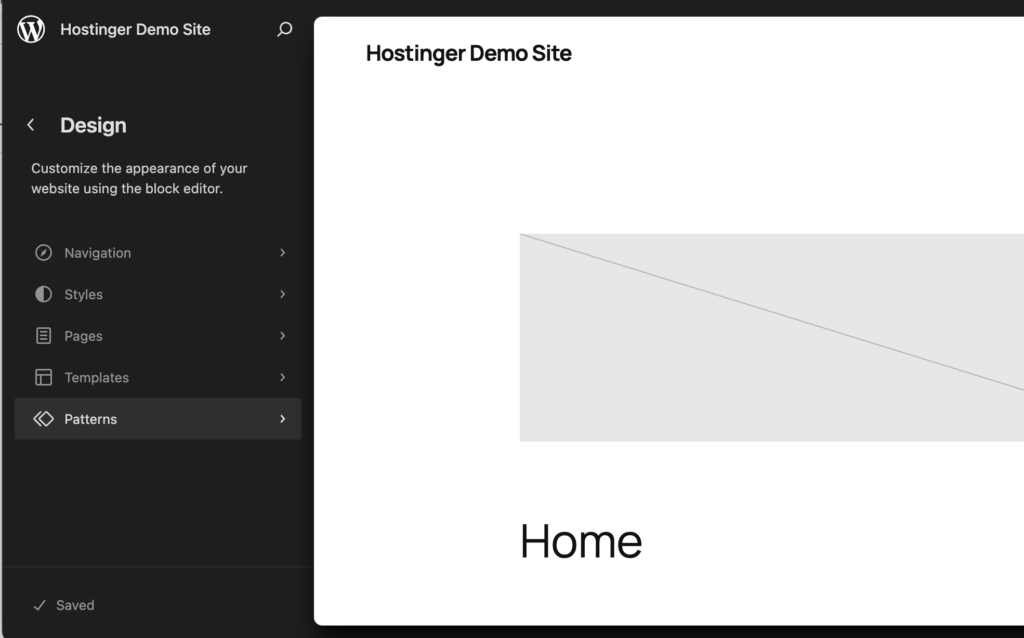
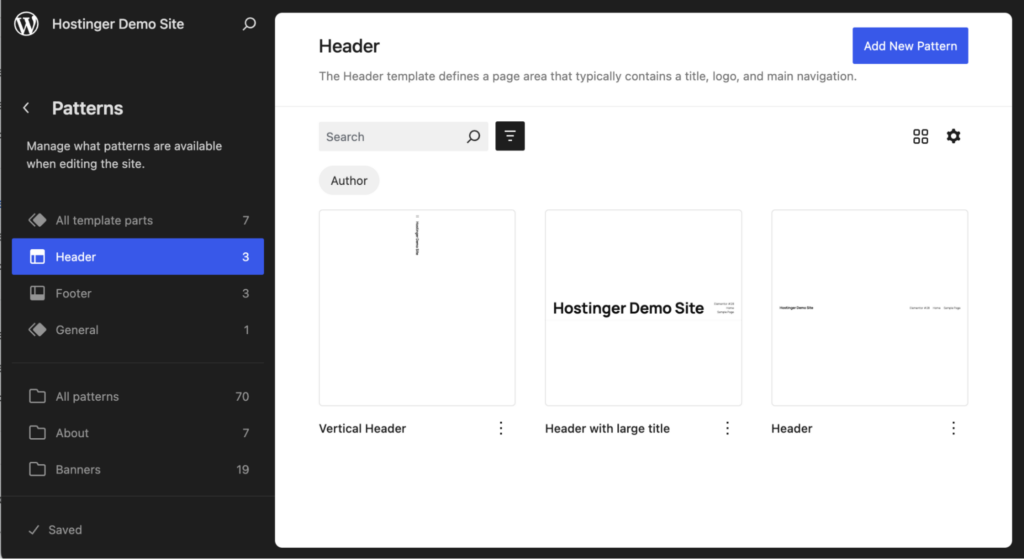
Go to Header to see all available designs. Open any of these designs to edit headers.
Alternatively, go to Footer to see all available footer designs.
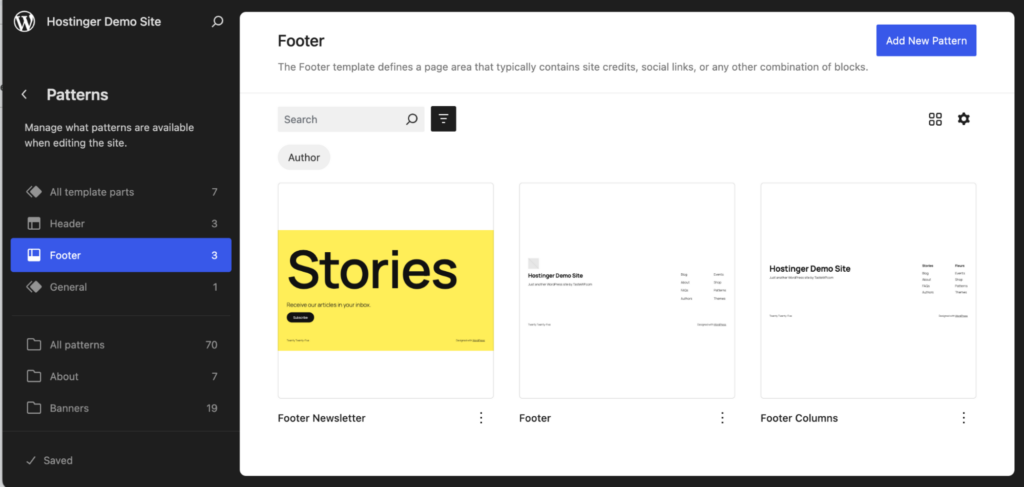
Click Add New Pattern → Add New Template Part on the top-right corner to create a new header or footer design.
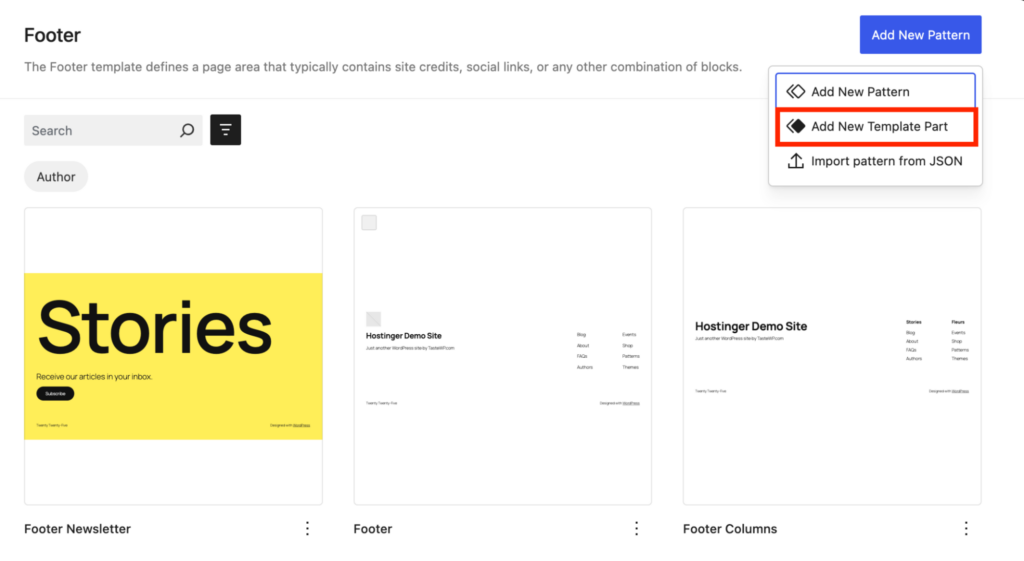
Choose whether you want to design a header or footer element. Then, add a name, select the type of template part, and click Add.
Here, you’ll find all the editing tools you need to design this new element. You can add new blocks or media as you like.
Using the Customizer
Classic WordPress themes split header and footer customization across two interconnected systems.
The Customizer handles visual styling (colors, layout, sizes), while the Widget Areas let you add functional content blocks like menus, search bars, and contact information.
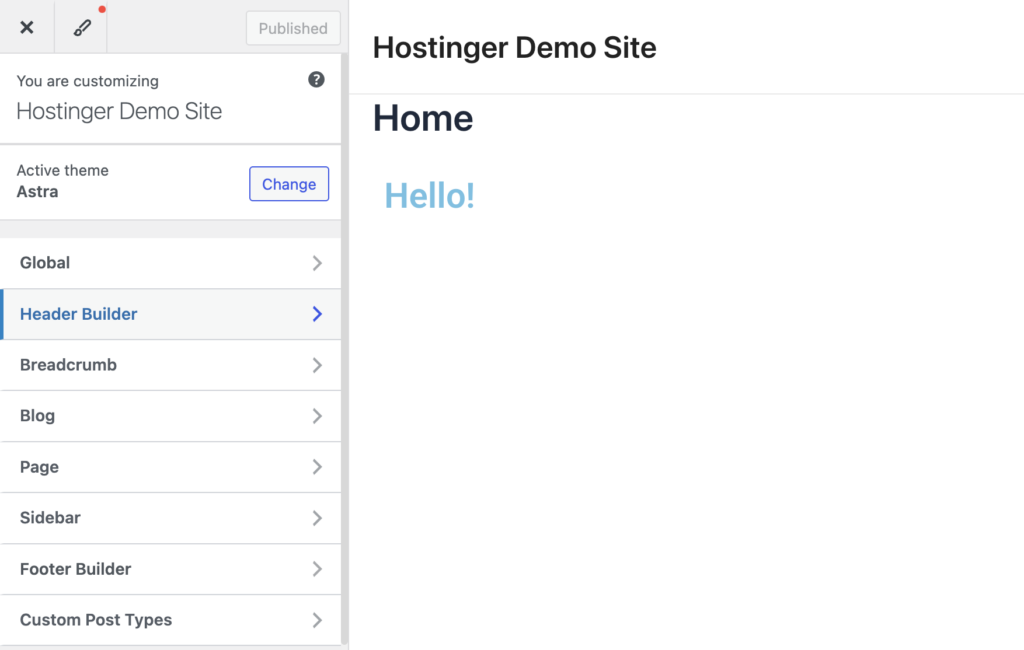
To access these systems, go to Appearance → Customize, then look for Header or Footer options in the sidebar menu.
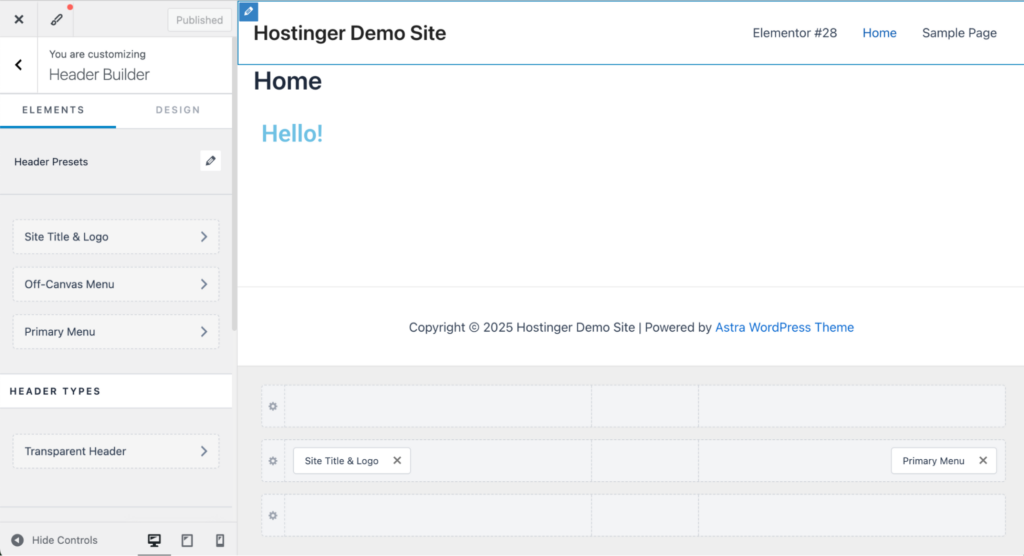
Click on Header Builder in the left sidebar to access design controls for your site’s top navigation area. You’ll immediately notice that header options vary dramatically between themes.
For this guide, we’re using the Astra theme because it offers exceptional header customization flexibility, revealing the full potential of WordPress headers.
If the theme has header presets, you’ll see them here. Depending on the theme, you can also add custom elements and widgets to the header.
Now, go back to the main menu and click Footer Builder to find all available footer options.
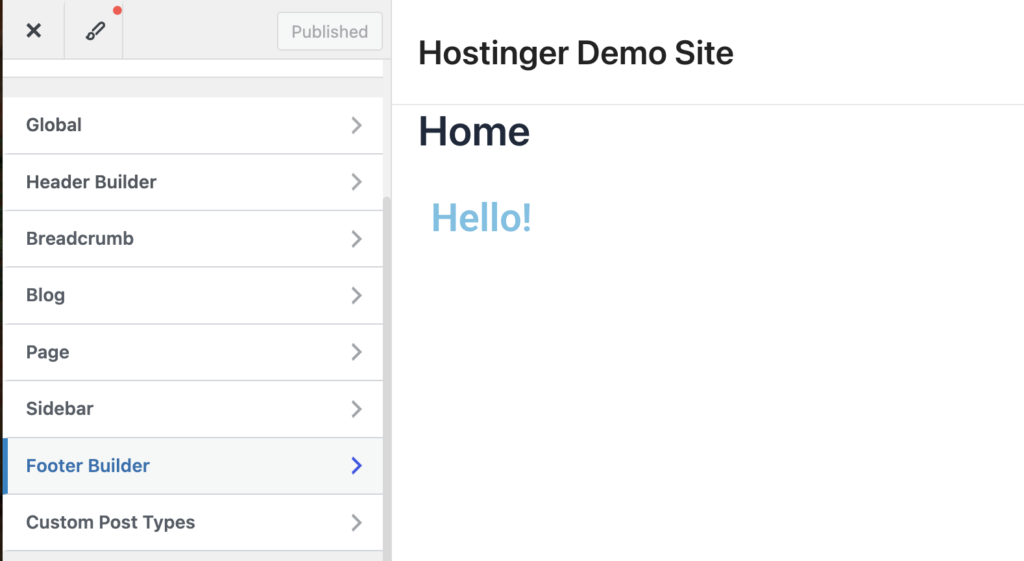
Within the Footer Builder, you’ll typically discover these key options to edit the footer:
- Layout configuration – define the structural grid of your footer (single row, multiple columns).
- Content areas – designate spaces for copyright information, navigation menus, and contact details.
- Widget zones – create dynamic regions where you can place elements like subscription forms or recent posts.
- Background styling – set the visual backdrop through colors, patterns, or gradients.
- Typography controls – establish readable text styles appropriate for supplementary information.
Some themes support multiple widgets, while others allow only a few. Here’s how you can add additional widgets and buttons to the Astra footer:
- Once you’re editing the footer, click through the different widget sections.
- The customizer will show you options to add widgets, custom HTML, etc.
- Choose the required widgets you want to add to each of the widget sections in your footer.
Using a page builder plugin
To edit your site’s header and footer with a page builder like Elementor, use the Theme Builder again.
From the dashboard, click Elementor → Theme Builder → Customize.
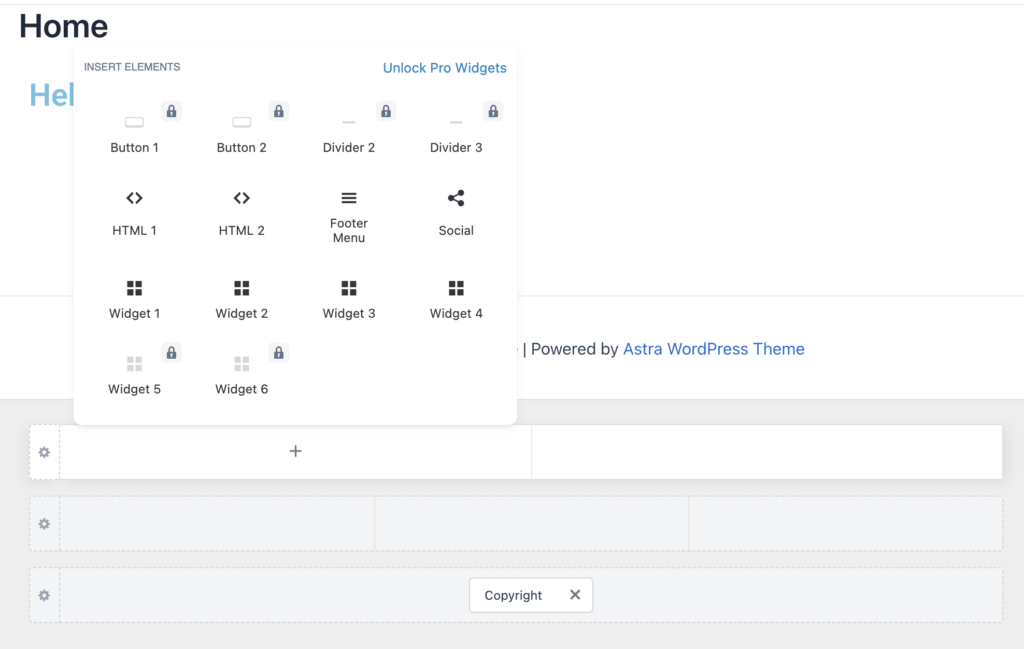
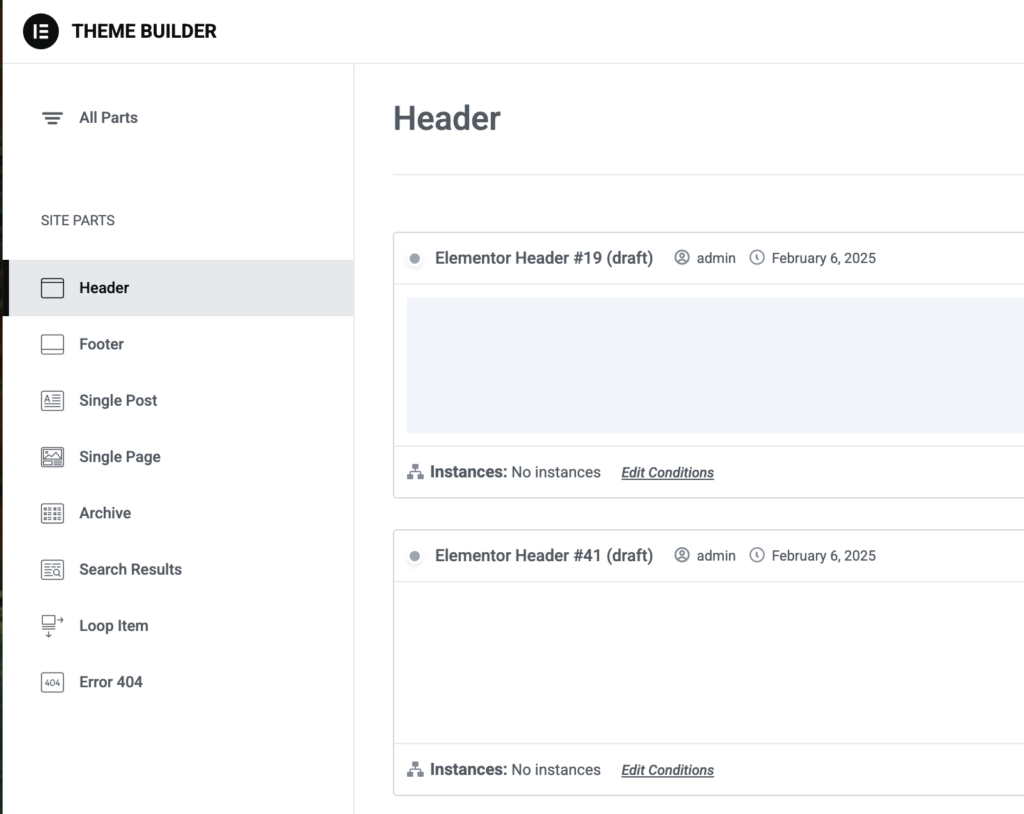
On the next page, select Header or Footer from the left sidebar based on what you wish to edit. For this demonstration, let’s edit the Footer.
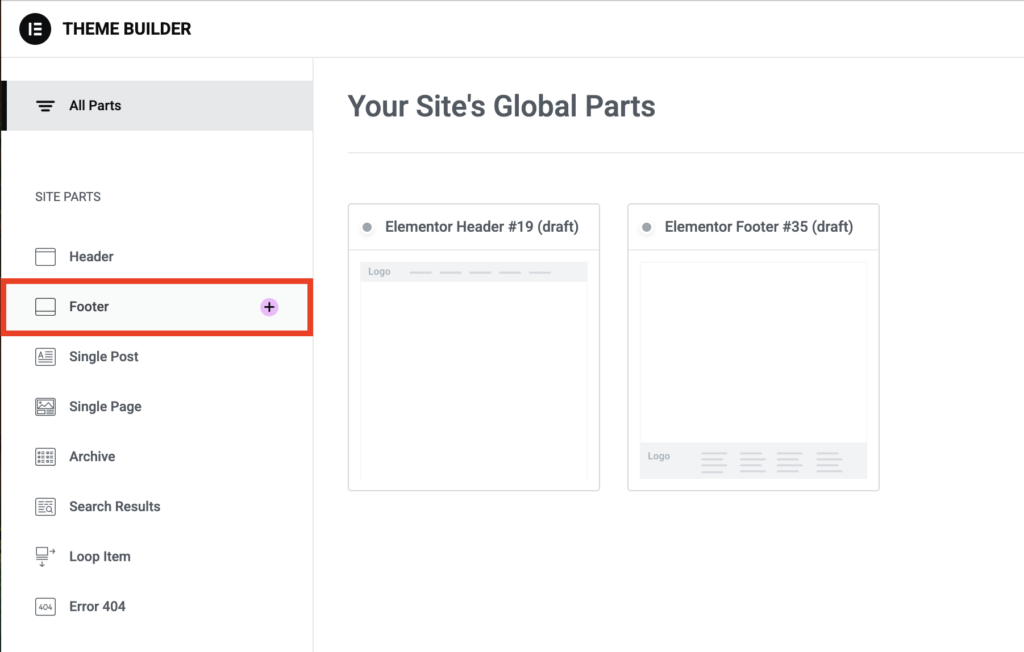
Elementor makes it easy to create footers with the help of pre-built blocks.

If you decide to close the pop-up, you’ll have a blank space to create your footer. You can drag and drop the elements into your Footer section to build it from scratch.
How to edit the navigation menu
A well-structured navigation menu improves the user experience. Let’s explore how to create and customize navigation menus using the three WordPress editing methods.
Using the Site Editor
The Site Editor handles navigation menus through a dedicated Navigation block system. Here’s how to create and customize your menu:
Go to Appearance → Editor in your WordPress dashboard.

Click Navigation to access customization options for the navigation menu.
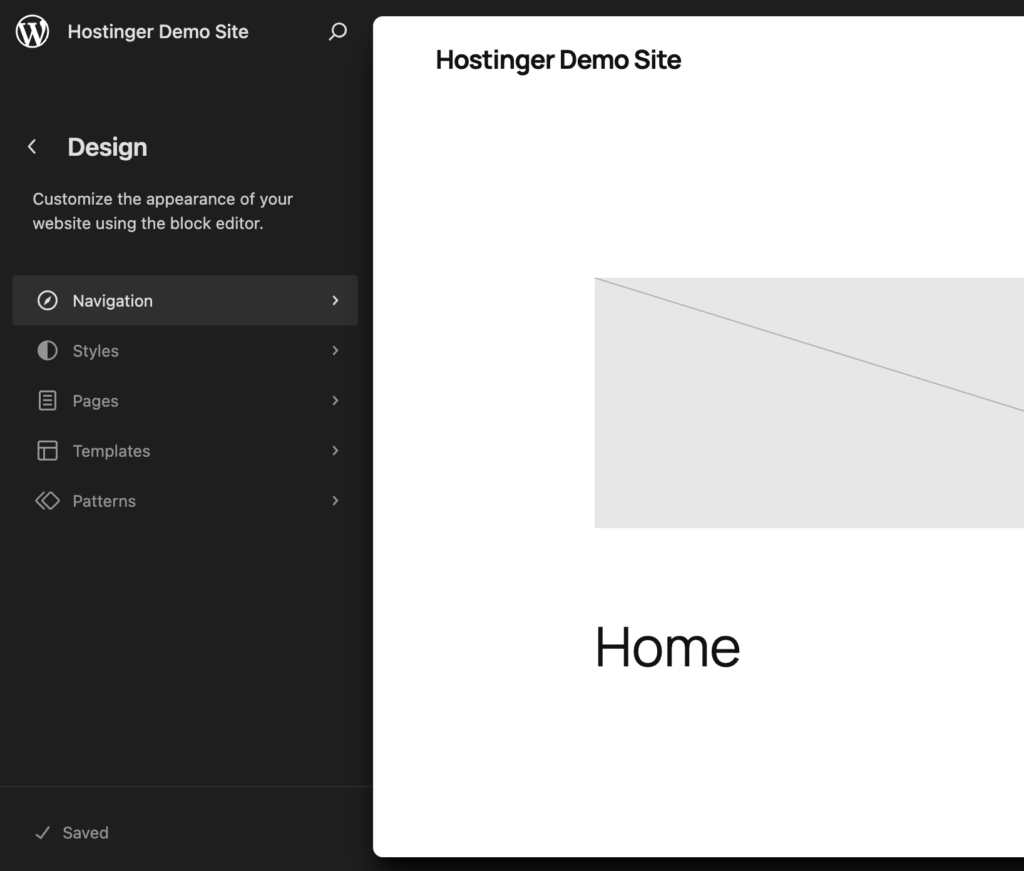
Here, you’ll be prompted to allow editing of the navigation menu. Click Edit, and you can now customize the menu.
You can add new items to the list and link to existing pages. If you want to remove a menu item, click on the three dots beside the menu item and hit Remove <item name>.
Customize this block by changing the layout, color settings, spacing, and typography.
You can also create a dropdown menu by nesting items under a parent page. Drag them slightly toward the right side to create a nested submenu.
Using the Customizer
The Customizer offers a dedicated menu interface to edit your navigation menu. Here’s how:
Go to Appearance → Menus in your WordPress dashboard.

You’ll find the options to create a new menu. Add a name to your navigation bar and click Create Menu.
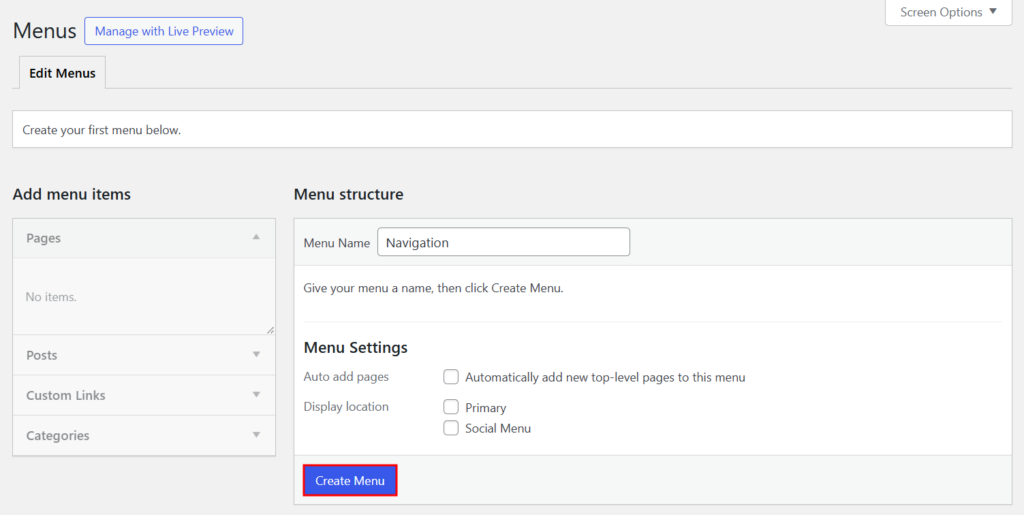
Select Pages or Posts to add items to this menu. You can also add Custom Links or post Categories.
Choose where you want to display this menu by selecting its location:
- Primary Menu is your main navigation that visitors use to explore your site. It typically appears at the top of your page, near your logo. This is where you’ll place links to your most important pages like Home, About, and Services.
- Social Menu is designed specifically for your social media links. It often displays as recognizable icons rather than text and can appear in your header or footer. This menu connects visitors to your Facebook, Instagram, or other social platforms.
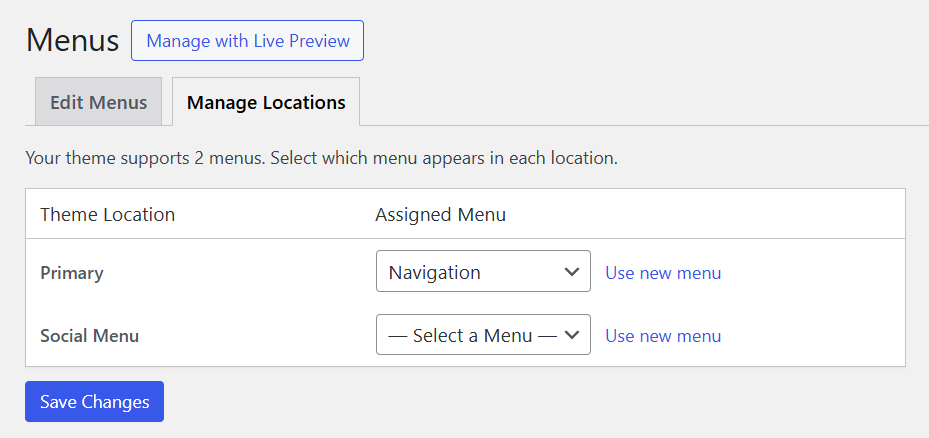
Preview the navigation and Save Changes to apply it to your website.
You can also create a nested menu with multiple items. Go to Appearance → Customize in your WordPress dashboard.
Press Menus to see all available menus.
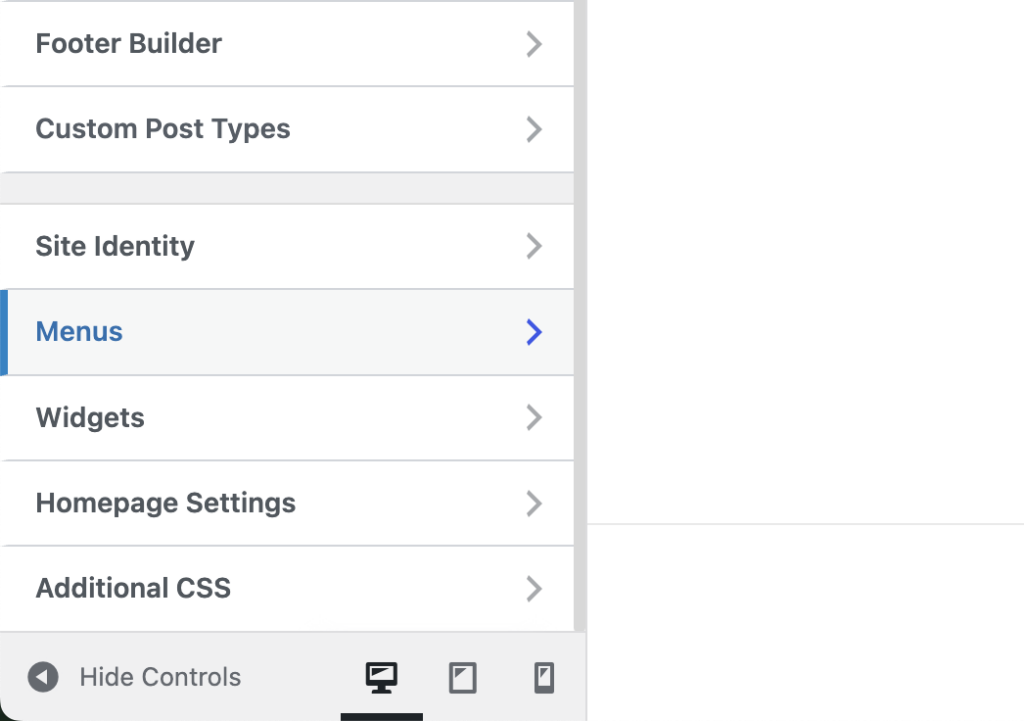
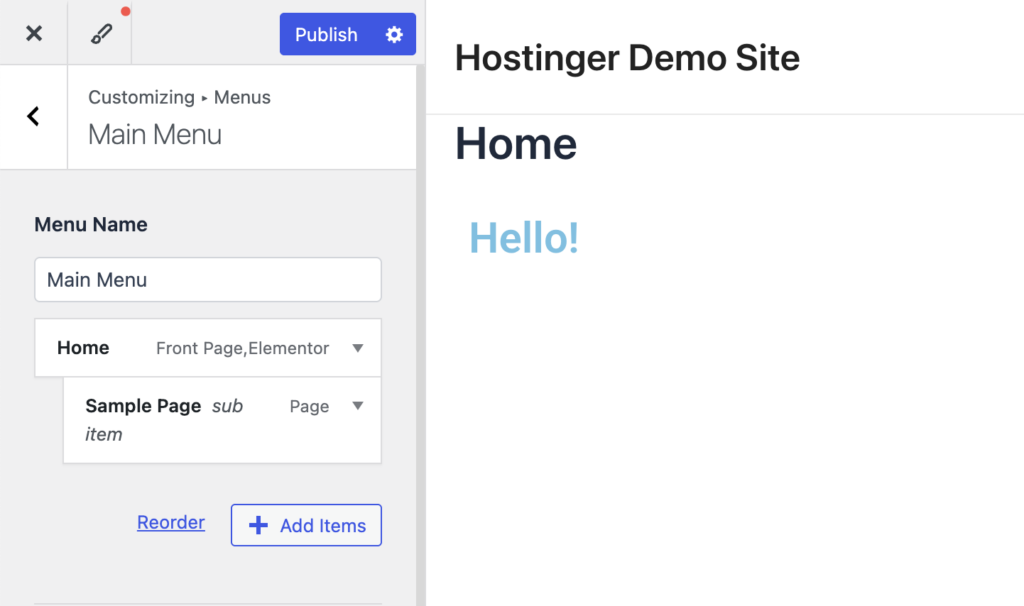
The left editing panel will show you all the items added to your menu. Hover over an item and move it slightly right to automatically nest it as a submenu under the parent item.
Using a page builder plugin
Page builders usually provide their own navigation menu modules with enhanced styling options. Here’s how to create and customize a navigation menu in Elementor:
Go to Elementor → Theme Builder in your WordPress dashboard.

Go to Header in the Theme Builder options to begin editing your site’s navigation. This critical entry point serves as both your brand’s first impression and your visitor’s primary orientation system.
You can now drag and drop the elements to the menu bar. If you wish to use one of the menus you’ve already created, drag the WordPress Menu element.
To customize the items displayed by this module, you need to go back to the WordPress Dashboard → Appearance → Menus as we did in the Customizer section.
However, you can add other custom elements included with the page builder, such as buttons, images, icons, and login buttons.
How to edit the site title
Your site title is important for branding and SEO. It appears in browser tabs, search results, and your website’s header. The most straightforward method to edit your site title in WordPress is through the admin settings.
Go to Settings → General in your dashboard.

Here, you’ll find these key fields:
- Site title: This is your website’s main name.
- Tagline: A brief description of your site (also known as the site description).
- Site Icon: An icon at the top of your browser tab.
Add your desired title, tagline, and icon, then click Save Settings to apply these changes.
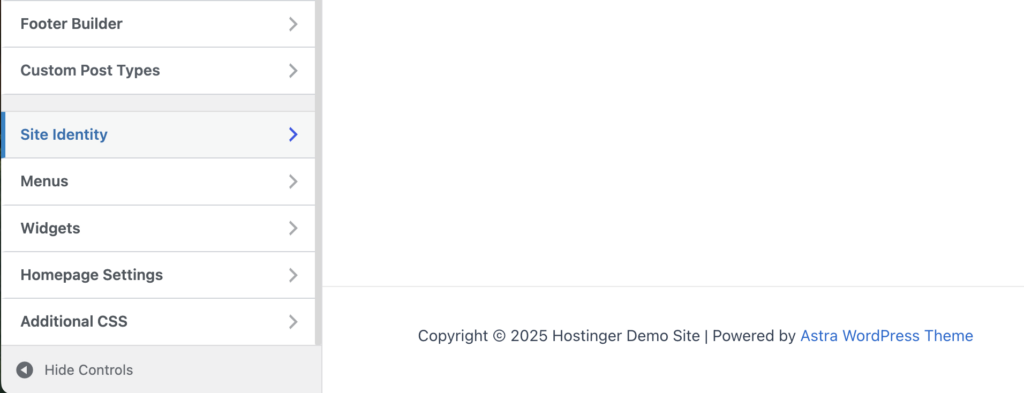
You can customize both the site title and tagline along with the logo from the Site Identity section in the Customizer.
Open the Site Identity tab.
Remember that any changes in your site title can impact your website’s SEO performance. So, make these edits thoughtfully to avoid any dips in your organic visibility.
An SEO-friendly site title is concise and relevant to the website, so aim to include your main keyword in the title.
Pro tip
Some themes offer additional options to customize the site title’s appearance, such as font settings, colors, and positioning. Check your theme’s documentation for theme-specific customization options.
How to edit a WordPress page and post
WordPress uses the Block Editor (Gutenberg) as its default tool for creating and managing content inside pages and posts. It follows a block-based approach, where each paragraph, image, button, or other content element is treated as a separate block that can be customized.
It’s important to understand the difference between the Block Editor and the Site Editor:
- The Block Editor (Gutenberg) is only for adding and managing content inside pages and posts.
- The Site Editor (available in block themes) allows you to modify the overall site structure, including templates, headers, footers, and global styles.
To get started, create a new page on WordPress by clicking Pages → Add New Page.
Alternatively, create a new post by clicking Posts → Add New Post.

Search for specific blocks by their exact WordPress names, such as lists, featured images, or columns. Then, click on your chosen block to insert it.
You can customize each block differently, for example:
- Image: Resize, reposition, apply filters, and add captions or links.
- Heading: Maintain proper structure using H1 for titles, H2 for sections, and H3 for subsections.
- Button: Customize colors, borders, and call-to-action text.
Best practices for editing posts and pages
Here are some aspects to consider when creating your pages and posts:
- Strategic heading structure creates a clear content hierarchy (H1 for title, H2 for main sections, H3 for subsections) that improves both readability and search engine understanding.
- Descriptive image alt text serves the dual purpose of making your content accessible to visually impaired visitors and providing search engines with contextual information about your visual elements.
- Consistent formatting through fonts, colors, and spacing reinforces your brand identity and creates a professional reading experience that builds trust with your audience.
- Multi-device previewing ensures your content displays properly across desktops, tablets, and phones. This is critical considering the diverse ways visitors access your site.
- Regular revision cleanup improves your site’s database performance by removing unnecessary stored versions of your content.
- SEO optimization tools like YoastSEO or Rank Math provide guidance for improving your content’s search visibility through targeted recommendations.
Also, before you publish, take a moment to optimize these final elements that significantly impact performance:
- Concise, descriptive URLs that clearly communicate page content (example.com/beginner-gardening-tips rather than example.com/p=123)
- Proper author attribution supports E-E-A-T (Experience, Expertise, Authoritativeness, and Trustworthiness), which is a key factor in Google’s content ranking.
- Logical page hierarchies that create intuitive site navigation (example.com/shop/product-name rather than example.com/product-name)
- Strategic category and tag implementation that organizes content for both visitors and search engines.
These practices create the foundation for content that performs well technically and delivers exceptional user experiences.
How to edit code in WordPress
If you have coding knowledge, you can customize a WordPress site by editing its core files. However, editing code directly comes with risks, so it’s important to apply changes carefully to avoid breaking your site.
These are some of the most commonly edited WordPress files for customization:
- functions.php: You’ll find this file in your theme directory. Use it to add custom functions to your website, like hooks and filters.
- wp-config.php: You’ll find this in your WordPress root directory. This file controls the core WordPress settings. It allows you to debug the site and manage security keys.
- Template files: Here are the most frequently edited template files:
- header.php: Controls site header structure.
- footer.php: Manages footer content.
- single.php: Controls individual post display.
- page.php: Handles individual page layout.
- archive.php: Controls archive page structure.
- style.css: Contains theme styling.
Follow our best practices when editing code on these files to avoid unwanted errors:
- Create a child theme: Avoid modifying the main theme directly. Instead, create a child theme in wp-content/themes/, add a style.css file, and apply your changes there.
- Use a staging environment: Set up a duplicate version of your site to test changes before applying them to your live site.
- Implement version control: Use Git to track changes and maintain a backup of previous versions, making it easier to revert if something breaks.
- Back up your site: Before making any code edits, create a full site backup and store theme and plugin files in multiple locations.
Conclusion
Editing a WordPress website is not hard when you understand how to use the tools available.
In this guide, we covered various ways to edit your WordPress site’s theme, title, header and footer, pages, posts, and even code.
So, whether you’re making small content updates or redesigning your entire site, we hope you find this guide useful.
How to edit WordPress site FAQs
Why can’t I edit my WordPress site?
If you can’t edit your WordPress site, check your user permissions and see that you’re logged into your dashboard at yourwebsite.com/wp-admin as an administrator. Conflicts with plugins or themes can also block edits, so try disabling them or switching themes. Some themes may not work with certain page builders which can also cause issues. Go through these steps one by one and find out what is blocking your progress.
How do I enable full site editing in WordPress?
To enable Full Site Editing (FSE) in WordPress, use a block theme that supports it. In your dashboard, go to Appearance → Themes, search for Full Site Editing themes, and activate one. Then, navigate to Appearance → Editor to access the Site Editor and modify your site’s structure.
Is It easy to edit a WordPress Site?
Yes! WordPress is designed to be user-friendly, even for beginners. The Site Editor (for block themes) lets you visually edit headers, footers, and templates. The Block Editor (Gutenberg) allows you to create and edit pages and posts using an intuitive drag-and-drop interface. You can also use the Classic Editor (for classic themes) or Page Builder Plugin (for both block and classic themes).

Ankit's superpowers are to ask questions, extract insights, and share the wisdom of industry experts with a journalistic approach. He’s a freelance B2B SaaS writer with over seven years of content marketing experience. He’s a gamer during the day and a writer at night (because opposite time zones are a thing.) Follow him on LinkedIn.