Integrate your web app with Supabase on Hostinger Horizons
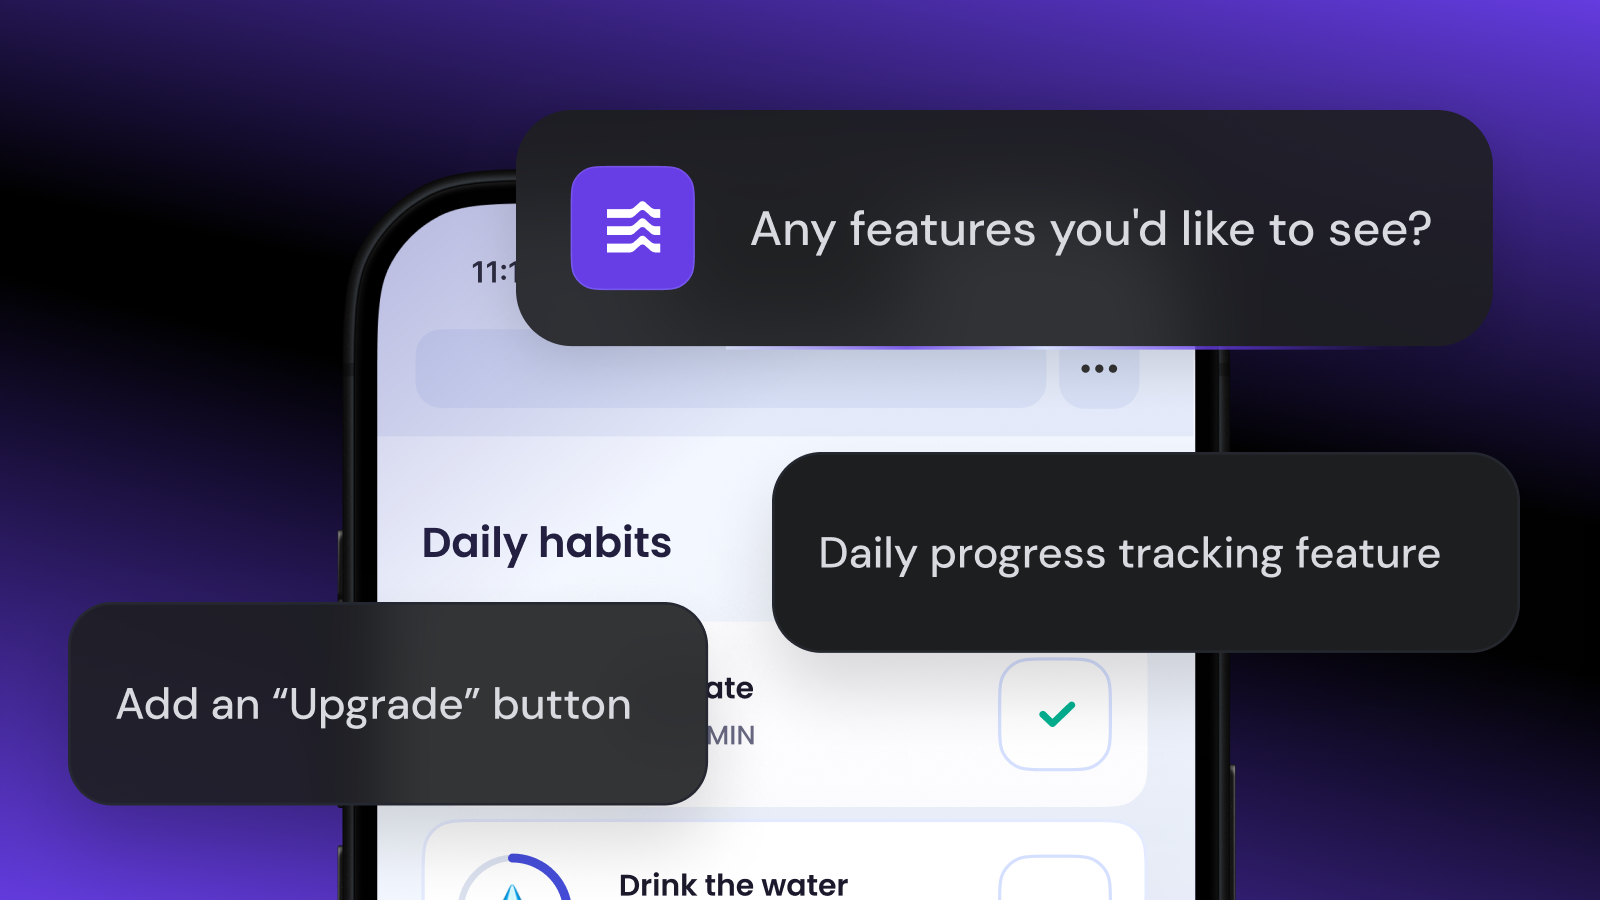
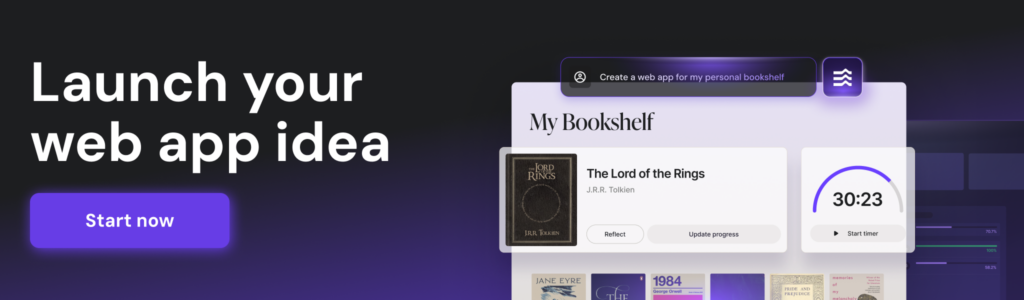
Hostinger Horizons lets you develop a fully functional web application without writing any code. Simply describe your project, and this AI platform will handle the rest.
And to expand the range of possibilities, Hostinger Horizons integrates with the Supabase database service. This means you can easily set up a backend infrastructure for your web application to enable dynamic data processing and storage.
In this tutorial, you will learn how to integrate your web application with a Supabase database on Hostinger Horizons. We will also make sure to cover some common errors and their solutions.
Why do I need Supabase?
Supabase is a database service provider that lets you easily set up a back-end service for your app. It is essential if you want to add advanced features to your web application, such as content personalization, collaboration, workspace sharing, and alerting.
When integrated with Hostinger Horizons, Supabase extends your application’s capabilities beyond what either platform can offer alone.
If you are developing a simple, static web application that doesn’t need user input, using Hostinger Horizons by itself is sufficient. This AI app builder provides a no-code development solution, hosting environment, and static data storage out-of-the-box. However, by connecting it with Supabase, you can transform your static application into a dynamic, interactive experience.
Here are some common Supabase use cases for web applications:
- Dynamic data storage – a database enables your web app to take and store user input. This is crucial for basic functionality like creating a user account and showing personalized content.
- Authentication – Supabase provides pre-configured authentication functionality to ensure only legitimate users use your application. You can also enable social login by integrating supported providers like Google and GitHub.
- Real-time data processing – Supabase Realtime provides instant data synchronization and processing capabilities. This enables you to add features such as collaboration or chatting to your application.
- API integration – an API allows you to connect various third-party services with your application to enable additional functionality. For instance, you can connect OpenAI’s LLM to include an AI-powered feature.
Integrate Supabase with Hostinger Horizons
Integrating Supabase with Hostinger Horizons is simple since you can do it directly from the platform’s dashboard.
Before proceeding, ensure you have fully built your Hostinger Horizons application and included all the necessary features. This way, the AI platform will understand which database tables it needs to add.
For example, use the following prompt to ask Hostinger Horizons to create a user login and sign-up page.
Create a login page that asks users for their email address and password. On that page, add a link that redirects users to the sign-up page if they don’t have an account. Set up the authentication method, which I will enable using Supabase later.
Once your application is ready, it’s time to create a Supabase account and database. Here’s how to do it:
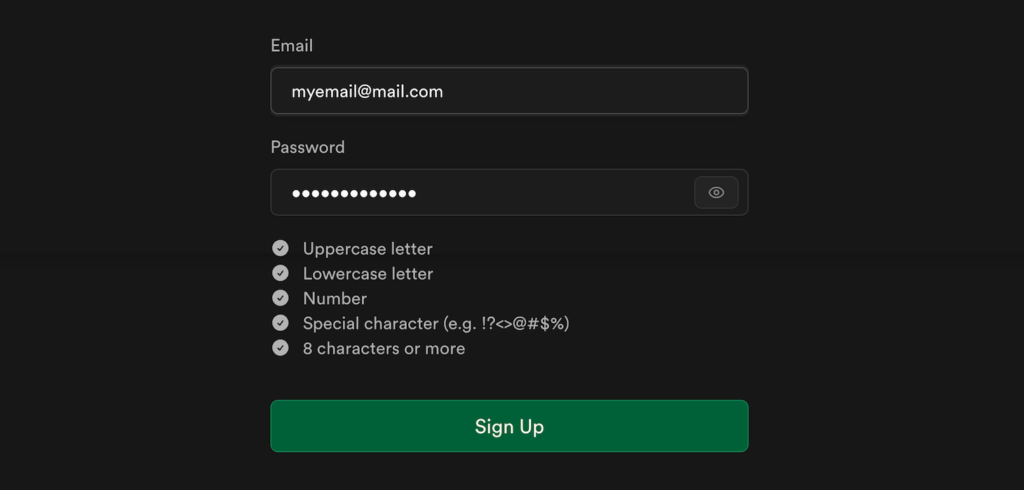
- Open the Supabase sign-up page.
- Enter your email address and create a new password. Click Sign up.
- Go to your inbox and open the confirmation email. Click Confirm email address.
- You will land on the Supabase organization configuration page. Enter a name, select the organization type, and choose a plan. Let’s choose the free one for a starter.
- Click Create organization to confirm.

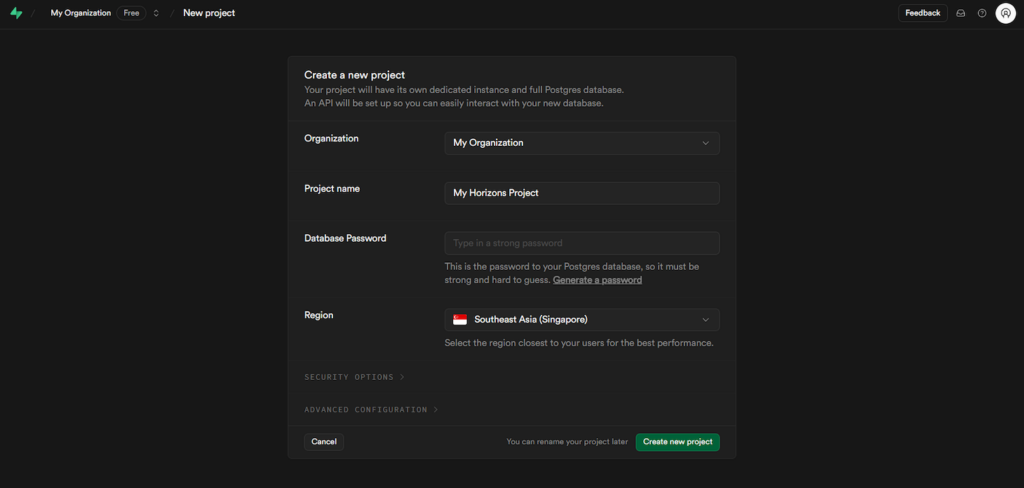
- You will be redirected to the project creation page. Enter the necessary information and click Create new project.
After setting up a Supabase database, we can proceed with the integration. Here are the steps:
- Open your Hostinger Horizons dashboard. Then, click Supabase → Add Organization.

- A pop-up window will appear. Log in to your Supabase account.
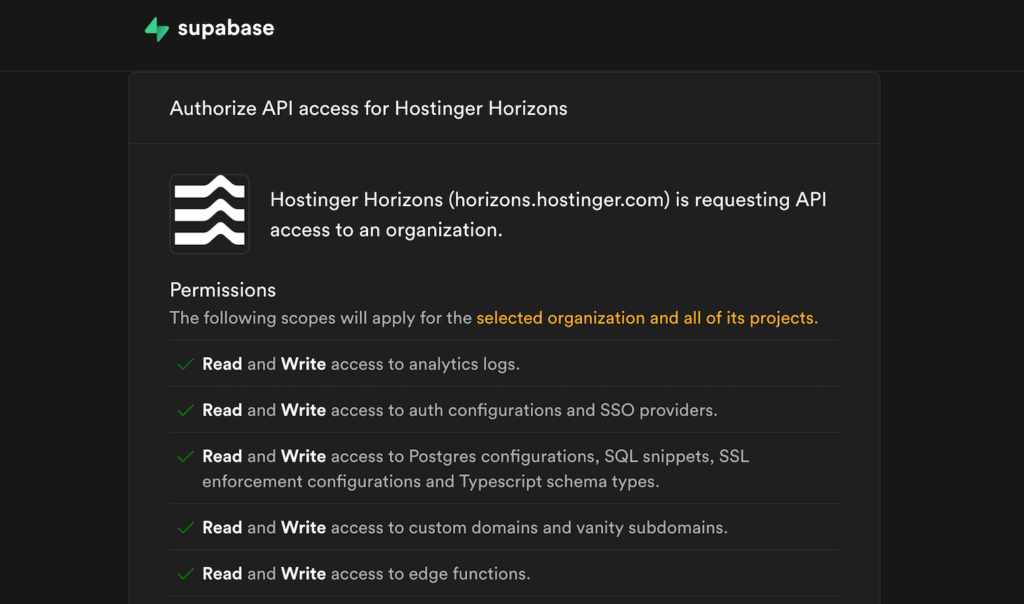
- Supabase should ask you to authorize the API access request. Click Authorize Hostinger Horizons.
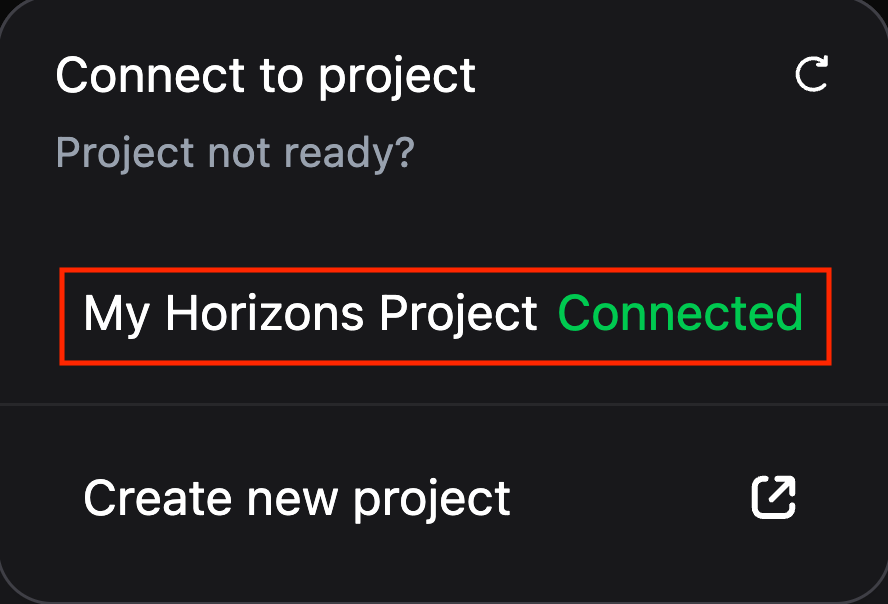
- Return to the Hostinger Horizons dashboard and click Supabase → Your organization.
- Choose the project you want to integrate with your application and hit Connect.
- A pop-up window will show up. Click Connect again to confirm.
That’s it! Now, if you open the Supabase menu in Hostinger Horizons, your project status should show as Connected.
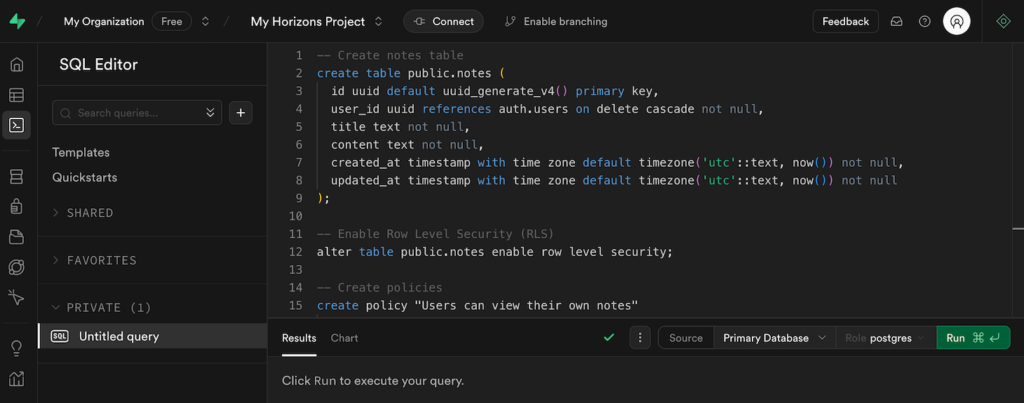
Depending on your application, Hostinger Horizons may ask you to run an SQL query in Supabase to create the necessary database tables.
If this is the case, log in to your Supabase account and open the project connected to Hostinger Horizons. Navigate to the sidebar → SQL editor. Paste the SQL query and click Run.
Testing your Supabase integration
After connecting your Supabase database, let’s test your web application’s functionality to ensure the integration works properly. The easiest way to do so is to use the app like a user would.
This process will differ significantly depending on your web app functionality and purpose. Regardless, you can check all the features directly from Hostinger Horizons’ preview menu in the right sidebar.
In this tutorial, we will check how our note-taking application, which we created previously, handles sign-up, login, and real-time alerting features. So, we will create an account, log in to it, and create a time-sensitive note.
All features in our application work properly. All the previously created notes still exist when we relogin to an account. It can also send a notification based on the specified time.

Note that since Hostinger Horizons is still in the early stage, the integration might not work flawlessly on your first try. You might need to ask it to fix a few features and adjust several areas.
We’ll now go through some common issues that may arise when integrating Supabase with Hostinger Horizons, and suggest solutions for them.
Troubleshooting database connection
Errors commonly occur when integrating a Supabase database with your application. While Hostinger Horizons can automatically identify and resolve issues, problems on the database side require manual troubleshooting.
Here are some of the most common issues when connecting Supabase, their implications, and solutions.
Unexpected authentication behavior
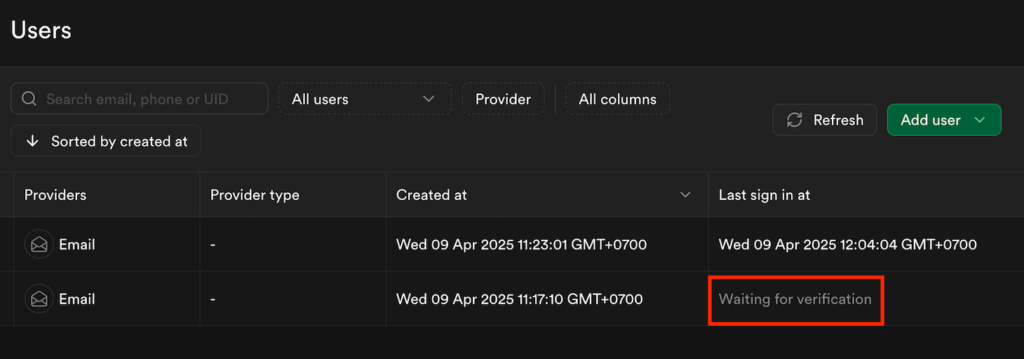
By default, Supabase will implement an email authentication method for account creation and login. The user must click the confirmation link sent to their email address to complete the registration process.
If you can’t log in after creating an account in your application, ensure you have authorized your account. Otherwise, you will see the Waiting for verification status on Supabase.
Should the authentication URL be invalid, check if the link starts with localhost:3000. If so, replace it with your web application’s address so Supabase can properly verify your email.
To do so, go to your Supabase dashboard → sidebar → Authentication → URL configuration. Replace the Site URL with your application’s address and hit Save changes. Repeat the verification process, and you should be able to create an account.

Realtime not syncing
If your application’s collaboration feature is not working properly, the issue most likely lies in Supabase’s Realtime configuration.
This is because when you prompt Hostinger Horizons to add features like collaboration, it only configures your application’s code. You still need to manually set up Supabase to enable Realtime.
Typically, you can resolve this issue by enabling replication for your database tables. To do so, go to the Supabase dashboard → sidebar → Database → Publications. Go to the Source column, click Tables, and toggle the Replication setting on.

If Realtime still encounters an issue after you configure the table replication, ask Hostinger Horizons to troubleshoot it. It will be able to identify the problem and give detailed instructions.
Invalid API keys
API keys are credentials that enable your application to communicate with your Supabase database. When they are invalid, you will encounter connectivity issues.
This commonly occurs when you connect the database manually by inserting the credentials into your application’s code. It is unlikely to happen if you use Hostinger Horizons’ built-in Supabase integration feature.
If you encounter this issue, simply paste the error code into Hostinger Horizons and ask it to resolve it.
Security best practices
Securing the web application and Supabase database connection is crucial since cybercriminals can intercept it to access sensitive information. Here are several security considerations when integrating Supabase with Hostinger Horizons:
Securing your keys in production
Supabase project API keys are highly sensitive credentials. If compromised, they can grant unauthorized parties access to your database.
To secure your API keys, store them in an environment variable instead of your application’s code. Although Hostinger Horizons disallows access to the project source code by default, we recommend asking it to include those credentials in another location.
Also, ask Hostinger Horizons to use database keys that are unexposed to clients for operations with higher permission requirements. In addition, make sure that your keys are not visible on the front end.
Using HTTPS, domains, and CORS properly
Tell Hostinger Horizons to integrate Supabase with your application via HTTPS only. This secure, encrypted protocol ensures data transmission between those two services is safe from tampering.
Replacing the temporary domain with a proper one can also help improve your web application’s security. You can do so directly via the Hostinger Horizons dashboard after publishing your project.
Using a domain you own provides full control, ensuring its integrity and security. Also, you can set up Cross-Origin Resource Sharing (CORS) policies to allow only your domain to interact with the Supabase backend.
Managing user roles and database RLS policies
Supabase provides the Row Level Security (RLS) system, which helps you create access rules and policies for your database.
To secure your database, create a policy that permits users to only view, access, and modify their data. This helps prevent unauthorized parties from accessing others’ records, which can present security risks.
In addition, regularly check user roles and their permissions in your database. Ensure they don’t have overly high privileges that grant them unnecessary access to sensitive data or tables.
Conclusion
Hostinger Horizons alone is sufficient for building a simple, static web application. However, you must integrate a database service like Supabase if you wish to add advanced features involving dynamic data storage and processing.
To integrate Supabase with your web app, simply click the Supabase button on the Hostinger Horizons dashboard. Log in to your account and authorize the API access. Select an organization and project, then hit Connect.
Next, follow Hostinger Horizons’ instructions to create the necessary tables in the Supabase dashboard. If you encounter any integration issues, ask Hostinger Horizons to fix them or provide a troubleshooting guide.
That’s it! Now that Supabase is integrated into your web application, you can add more advanced features. If you encounter any difficulties during the setup, leave a comment below, and make sure to join our Discord community. Good luck!
Join our Discord channel for more tips and inspiration on making the most of Hostinger Horizons. Connect with the community, get expert advice, and stay updated on the latest features!

Aris is a Content Writer specializing in Linux and WordPress development. He has a passion for networking, front-end web development, and server administration. By combining his IT and writing experience, Aris creates content that helps people easily understand complex technical topics to start their online journey. Follow him on LinkedIn.